Before Installation
Thank you for choosing our theme. In this documentation, we provide the necessary information to install and use the Forecast theme. We hope you enjoy using our theme. If you need further assistance, please feel free to contact with us via yvg.tech@gmail.com
Host Requirements
- PHP version 7.4 or greater
- MySQL version 5.7 or greater
Browser Compatibility
Forecast is compatible with the following browsers:
- Chrome
- Microsoft Edge
- Opera
- Firefox
- Safari
Installation
Download WordPress
You need to download and install WordPress version 6.3.1 or later
Theme Installation
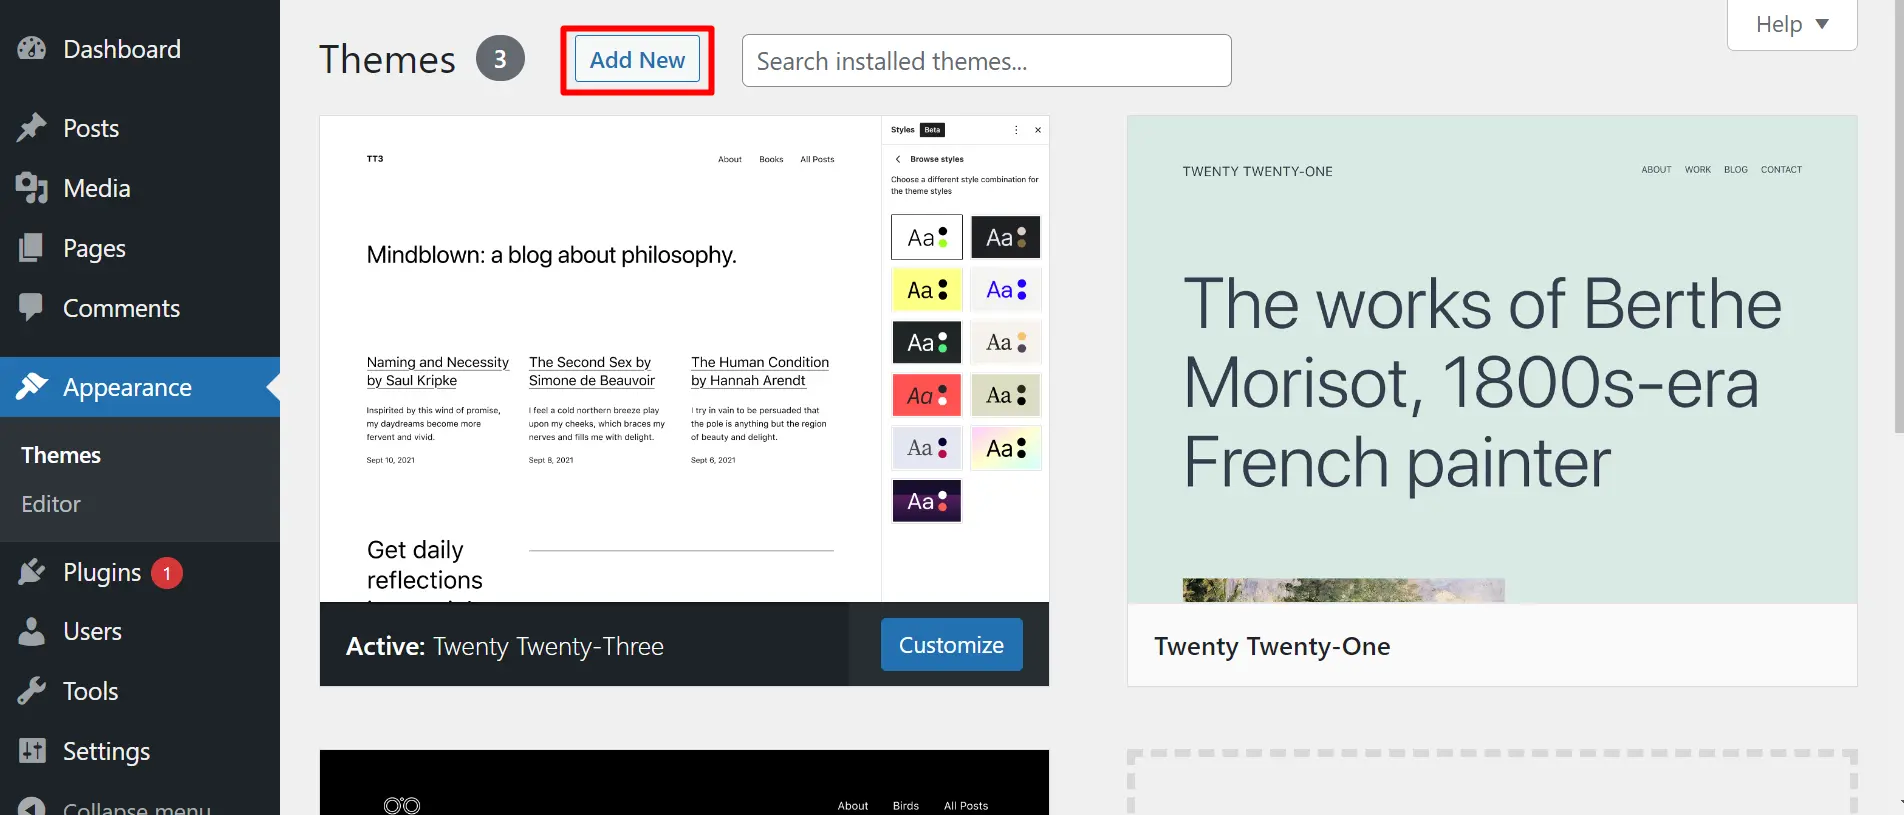
To install Forecast theme on Wordpress:
- Navigate to WordPress Admin Panel, and select Appearance > Themes
- Click on Add New button
- Click on Upload Theme button
- Click on Choose File button and select forecast.zip file on your computer
- Click on Install Now button
- Activate the theme
- Then follow the steps to install required plugins
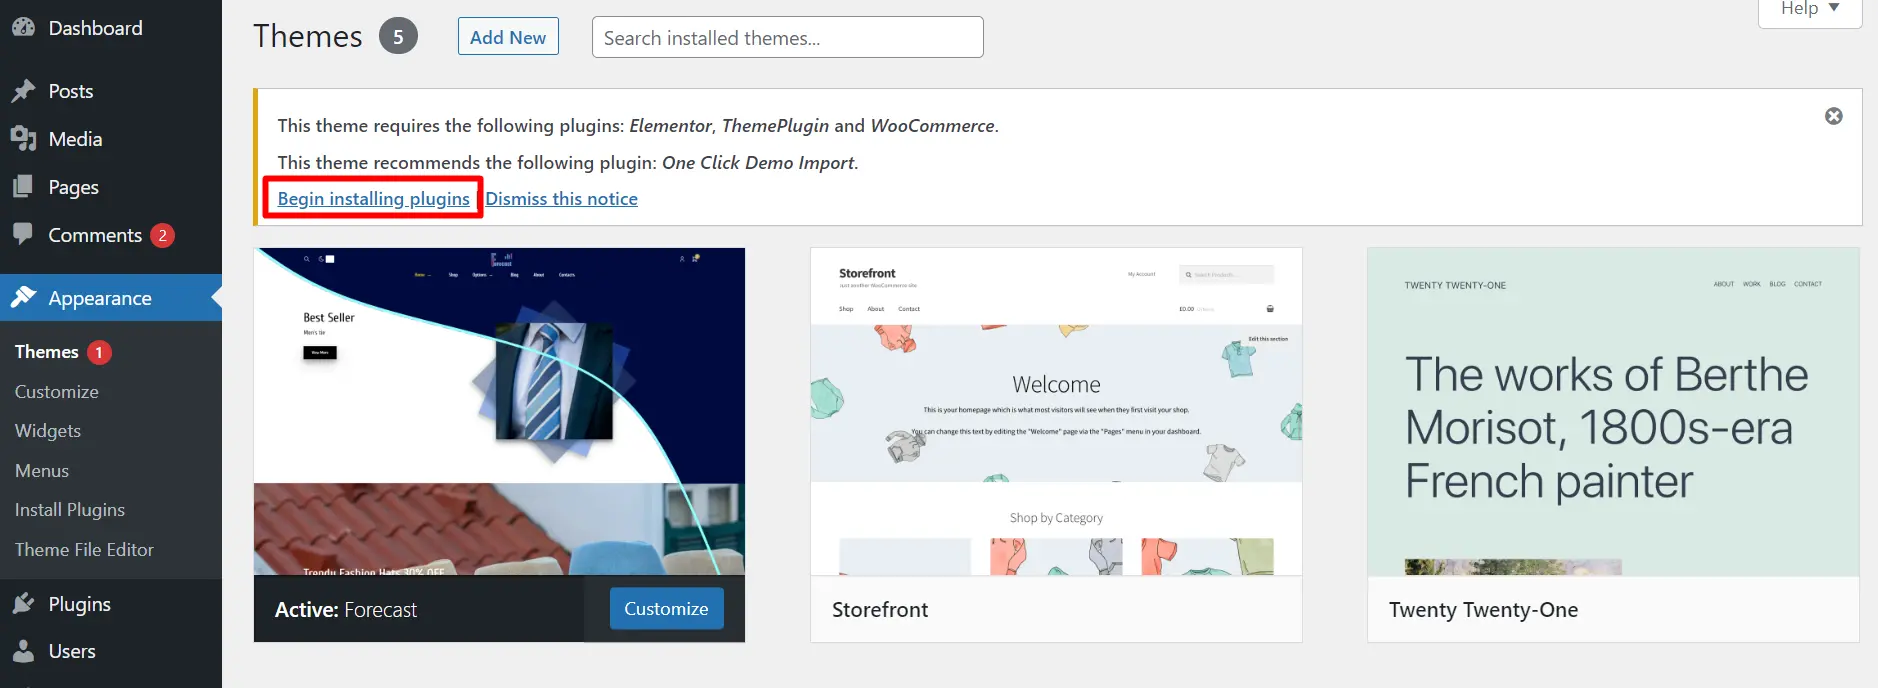
Required Plugins
Click on Beign installing plugins to install plugins.
Install all plugins one by one.
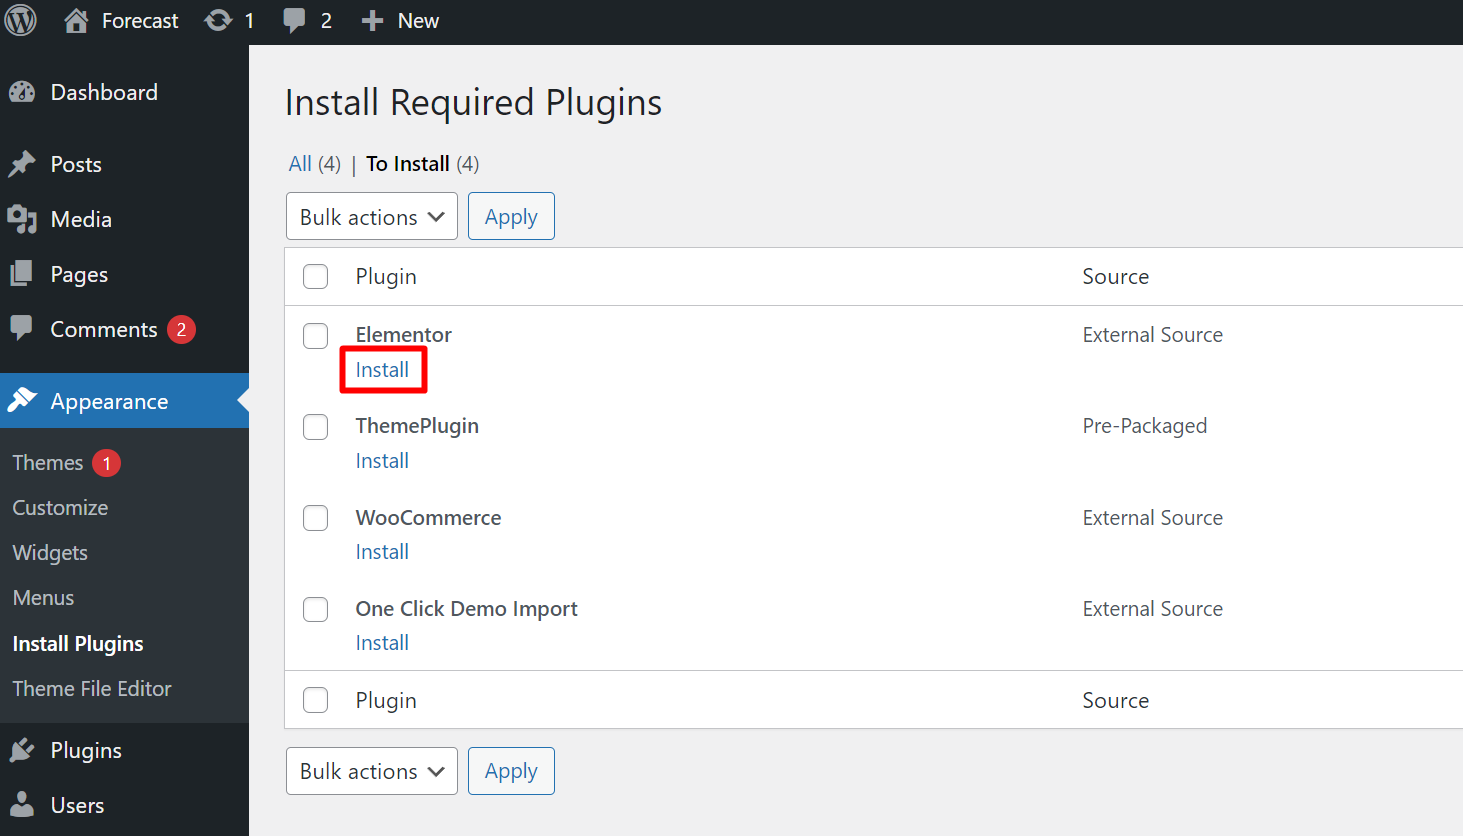
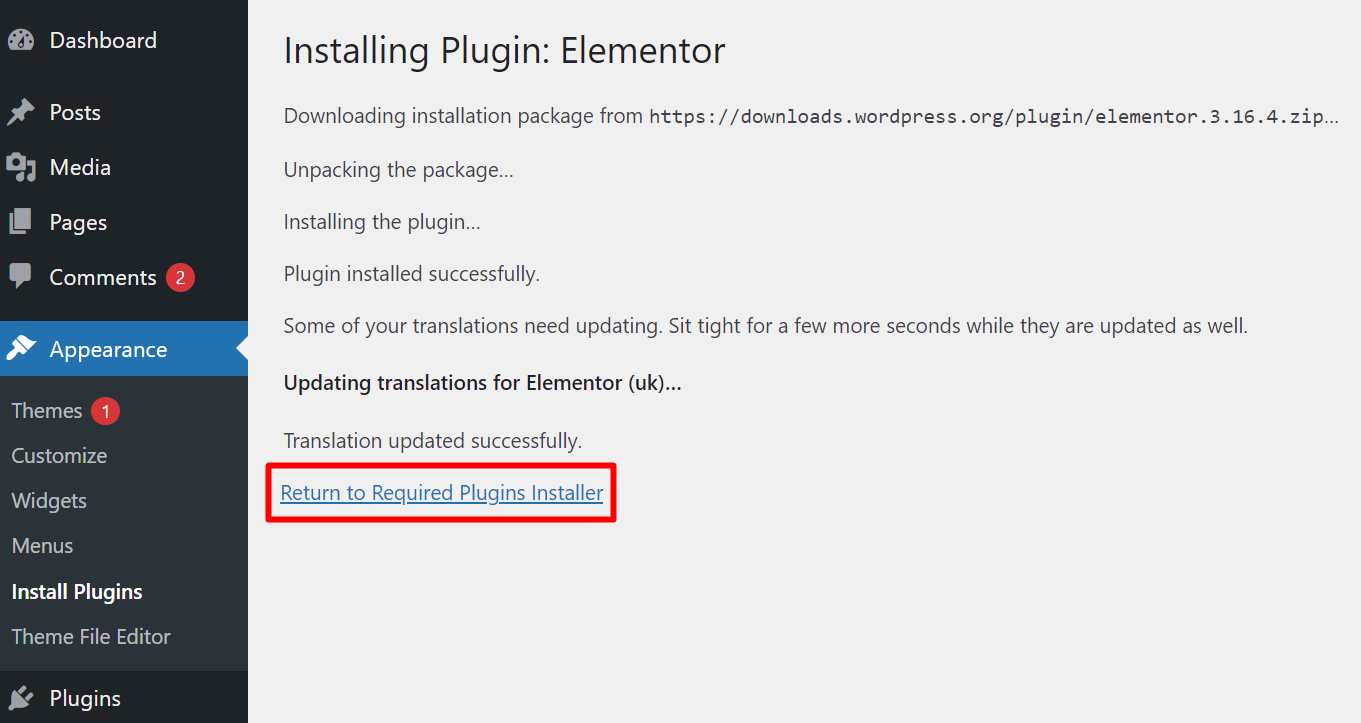
After each plugin has been installed, click Return to Required Plugins Installer.
After all plugins have been installed, activate them one by one.
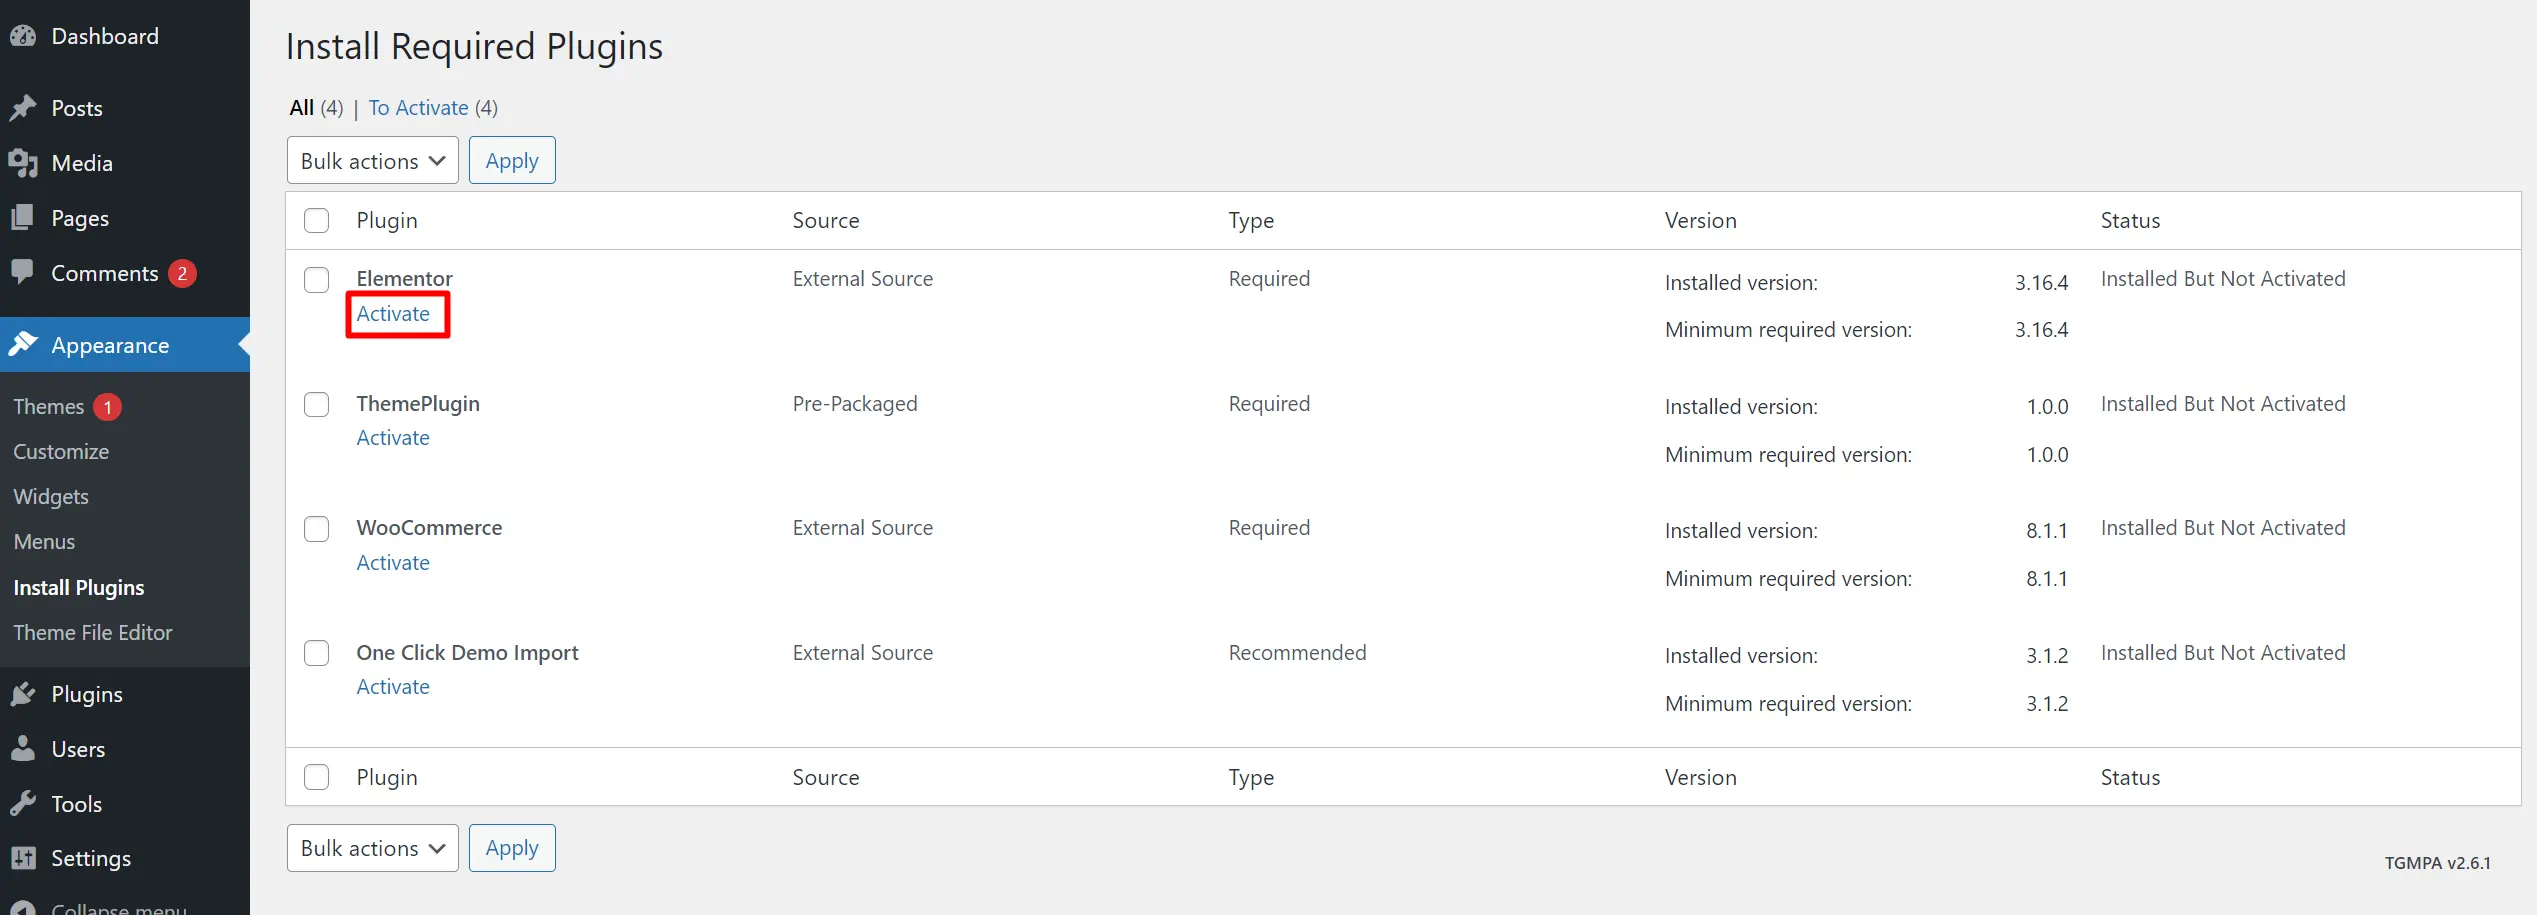
Our theme requires the use of only two third-party plugins (WooCommerce and Elementor). ThemePlugin is part of the Forecast theme, and One Click Demo Import is a plugin that is needed to initialize the demo data.
Demo Content
To finish installing the Forecast theme, download the demo data using the One Click Demo Import plugin.
In admin panel, go to Appearance > Import Demo Data

Then please click on Import Demo Data button
After that, click Continue & Import button (without selecting any recommended plugin).
Please wait a few minutes to complete!
To complete the installation process please setup mail settings.
In Forecast, email is used to send a letter to the admin and the client when an order is placing , as well as to operate the contact form on the Contacts page.
In order to setup mailing, click Mail in WordPress admin. Next, you need to fill in the fields with the data of your SMTP server:
- SMTP host, SMTP port, SMTP user, SMTP password, SMTP secure protocol - standard fields, please check them with your hosting provider.
- SMTP from - email address that WordPress will use to send emails.
- SMTP to - email address to which letters from the contact form will be sent.
- SMTP name - will be displayed in automatic letters that your store will send to your customers, for example, when a customer places an order.
When you are ready, click the Save button.

Update
Please note that the Forecast theme may experience bugs after updating WordPress, the Elementor plugin, or the WooCommerce plugin. To avoid this, either do not update WordPress and the mentioned plugins, or wait for the next Forecast theme update.
Light/Dark mode
The user can change Dark mode to Light (and vice versa) by simply clicking on the button in the site header:


Please note that the Forecast theme has 4 different header designs, each of which supports switching between light and dark modes.
the Forecast theme has 4 different variants of header designs, each of which supports switching between light and dark modes.
Screenshot of Home page (with the V-1 Header) in light mode:

Screenshot of Home page (with the V-1 Header) in dark mode:

Customize colors
You can change the color palette for both Dark Mode and Light Mode. To do this, first go to WordPress admin>Appearance>Customize:
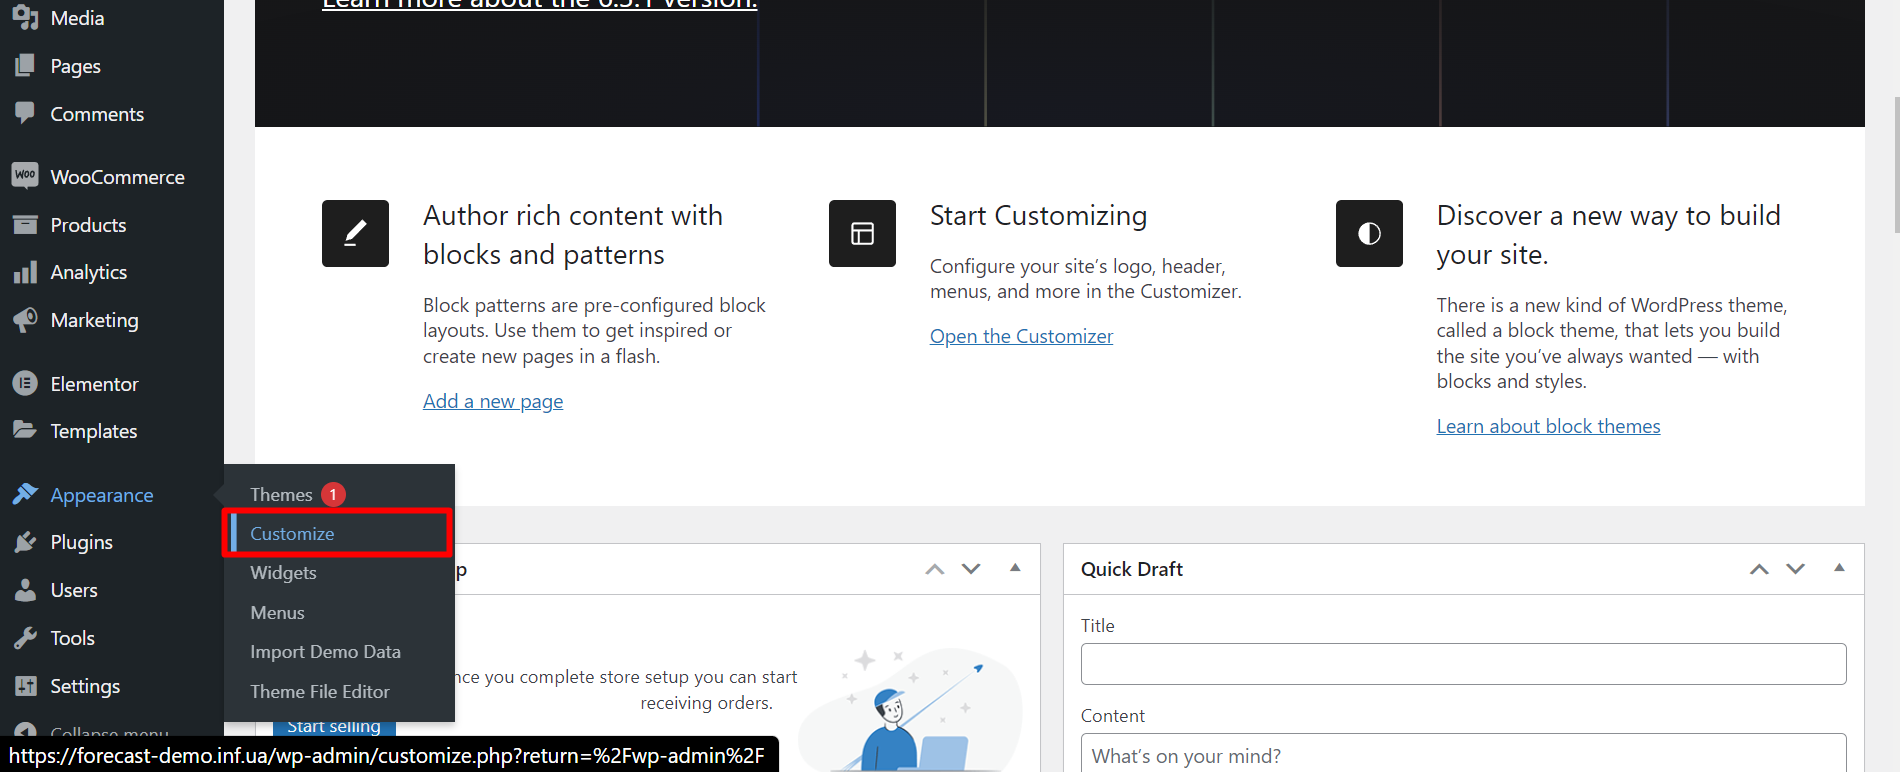
Then select Theme Color Mode:
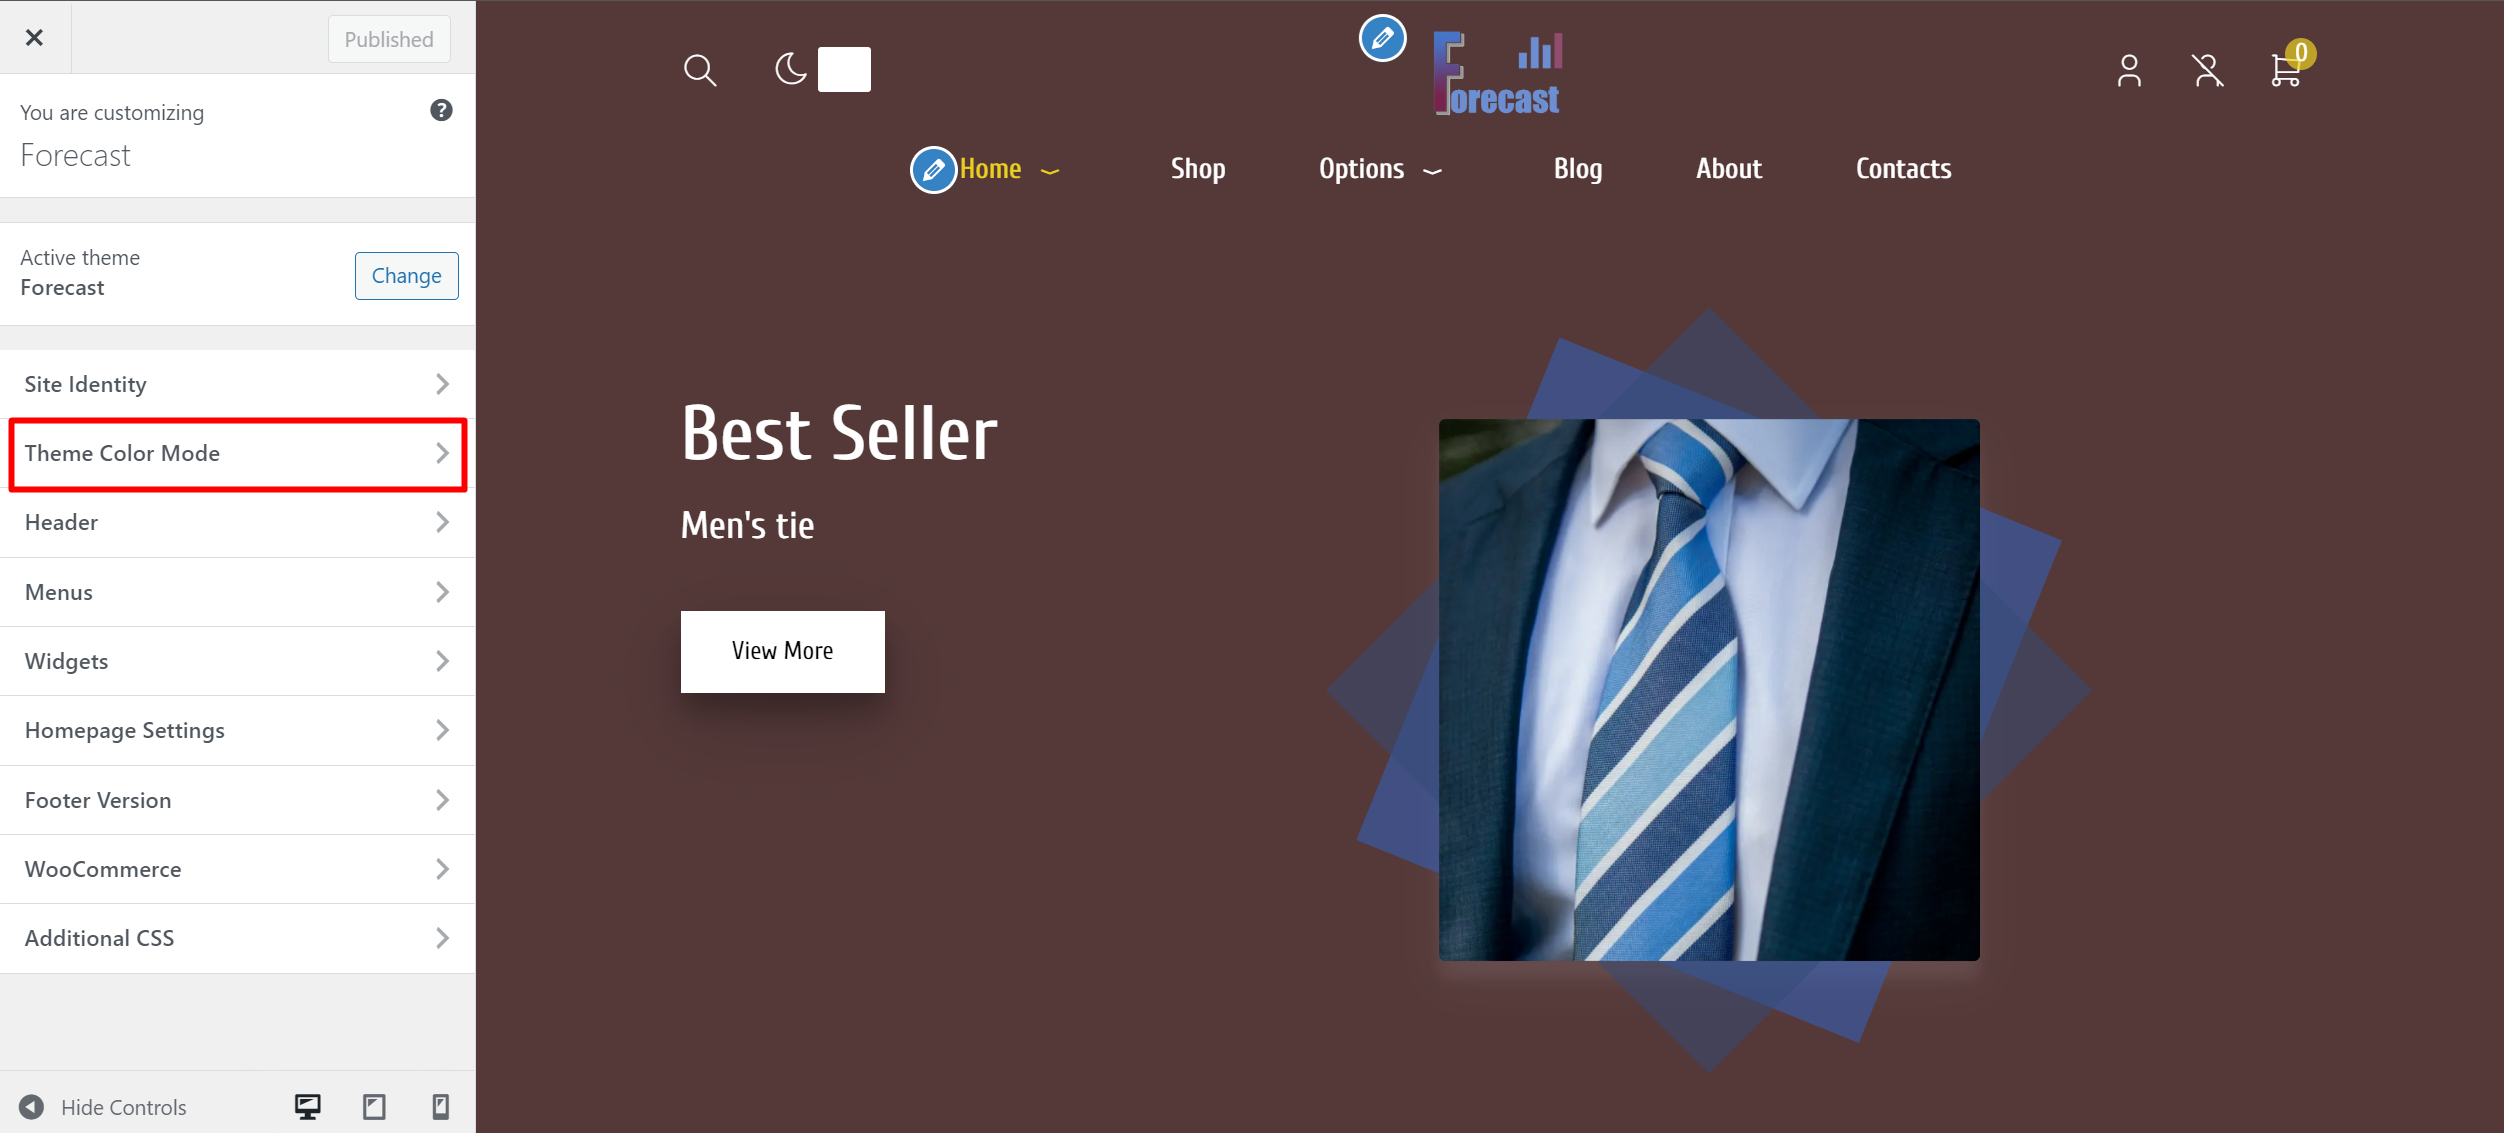
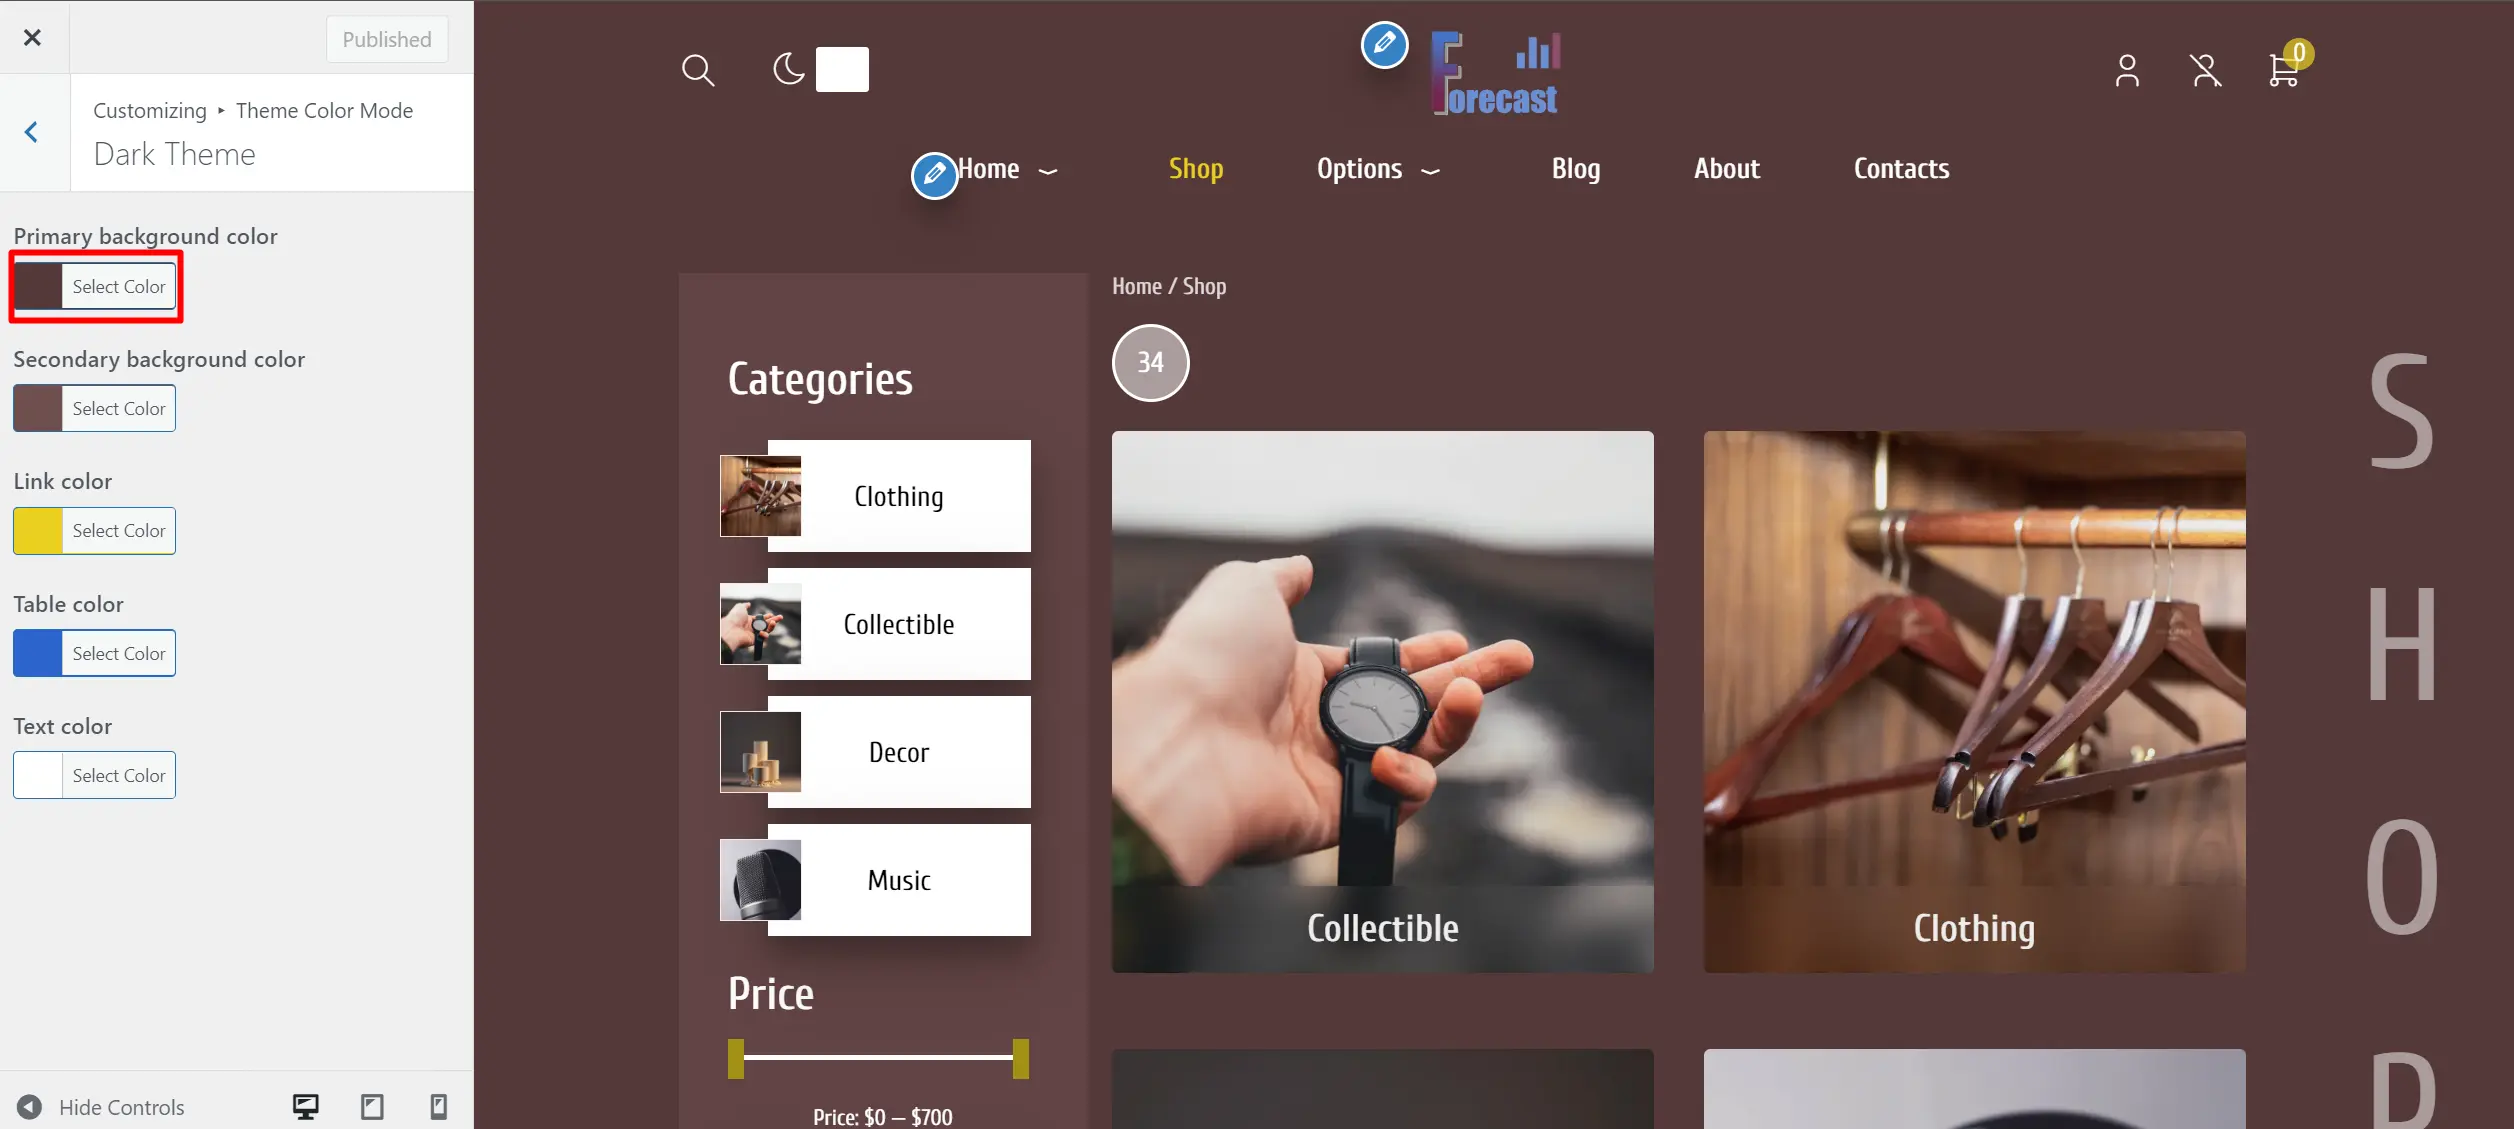
Next, select the mod (Light Theme or Dark Theme) that you want to edit. And finally, feel free to change the colors as you wish:
Pages
You can choose one of four versions of home pages (in each version a fully functional light and dark mode is implemented). You can also modify any page (including the home page) to your taste using all the advantages of the Elemenetor plugin.
Pages that were created by the WooCommerce plugin (Cart, Checkout, My account, Shop) as well as the Blog page cannot be customized by Elementor. These pages are customized in the Customize section.
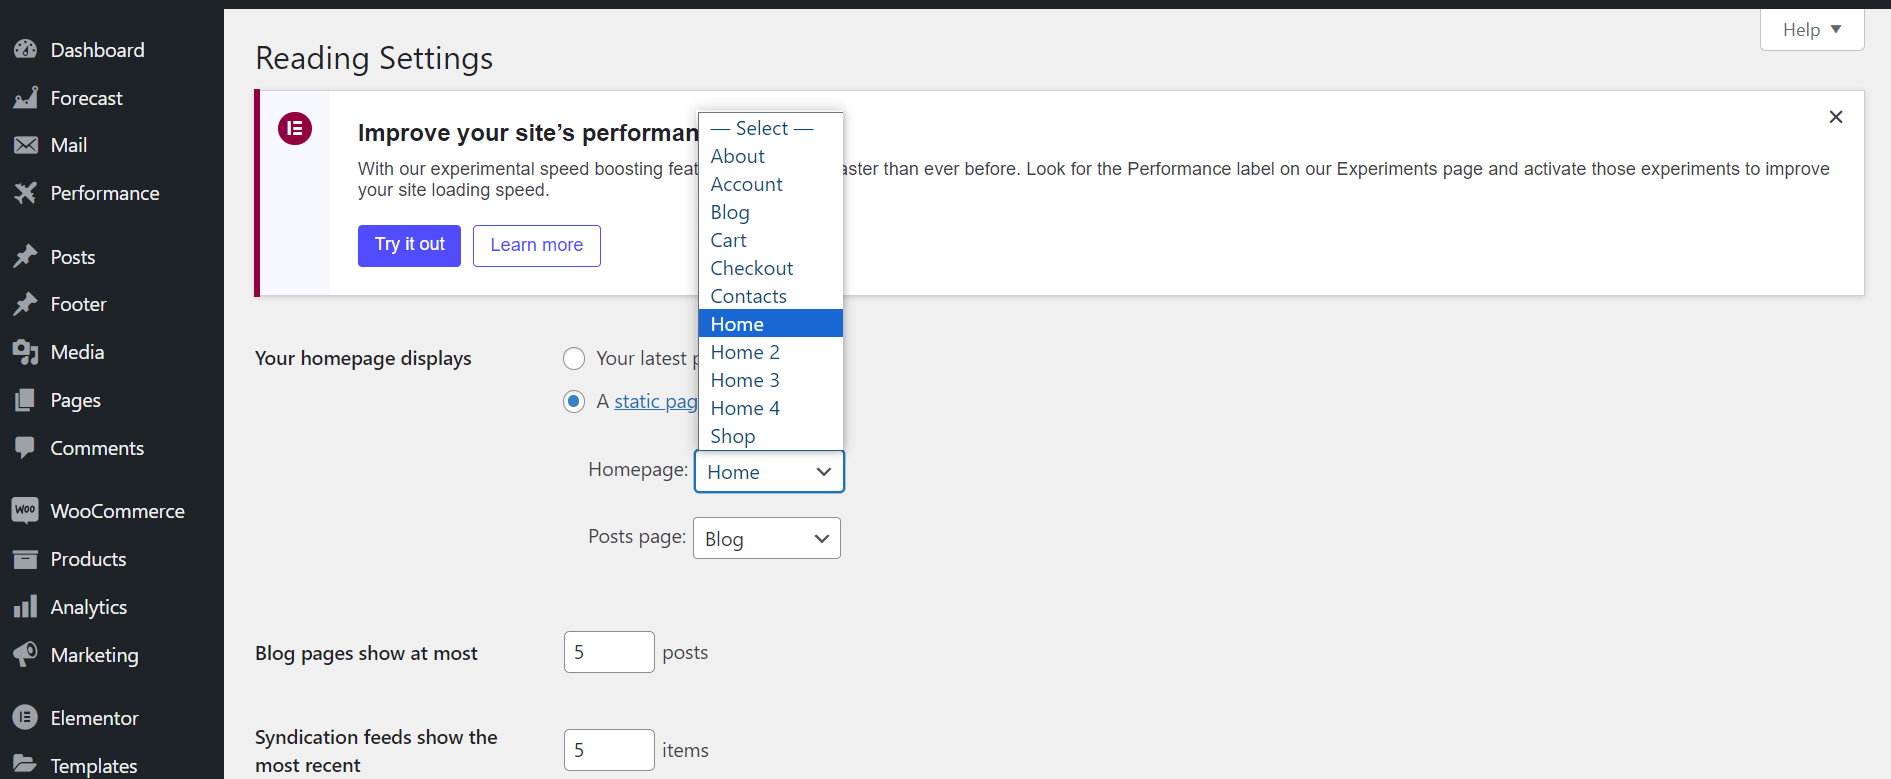
Select Home Page
To choose another version of Home page please navigate to Settings>Reading. And select version you need:
Page Customization
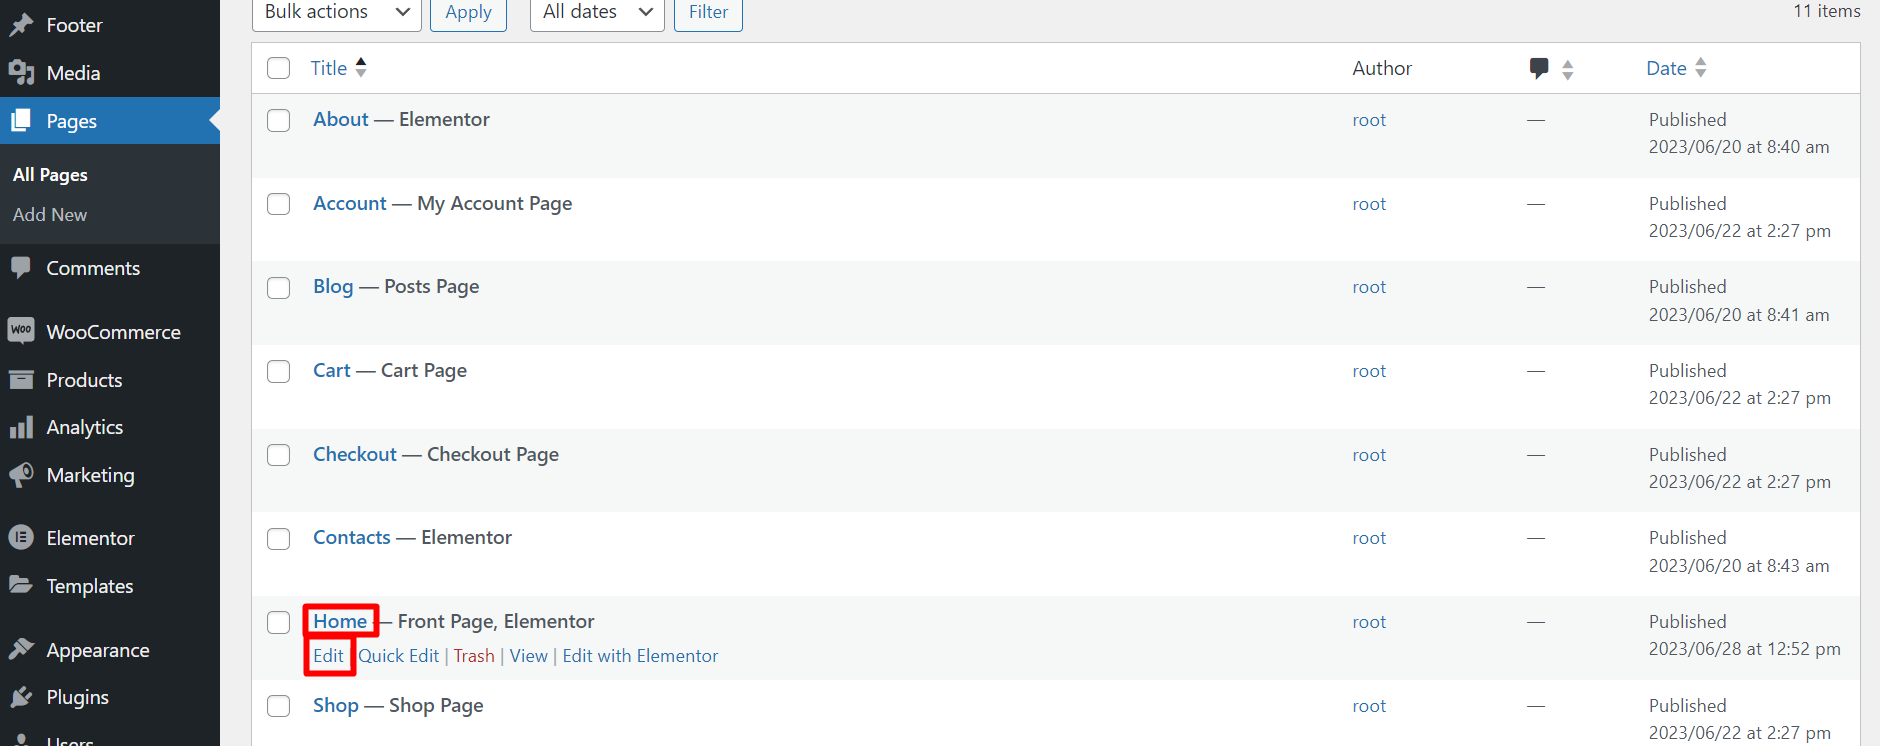
To change, add or delete a certain page, please go to the Pages tab of the WordPress admin panel.
- Click on the title of the page you want to edit, or on the Edit link under its title.
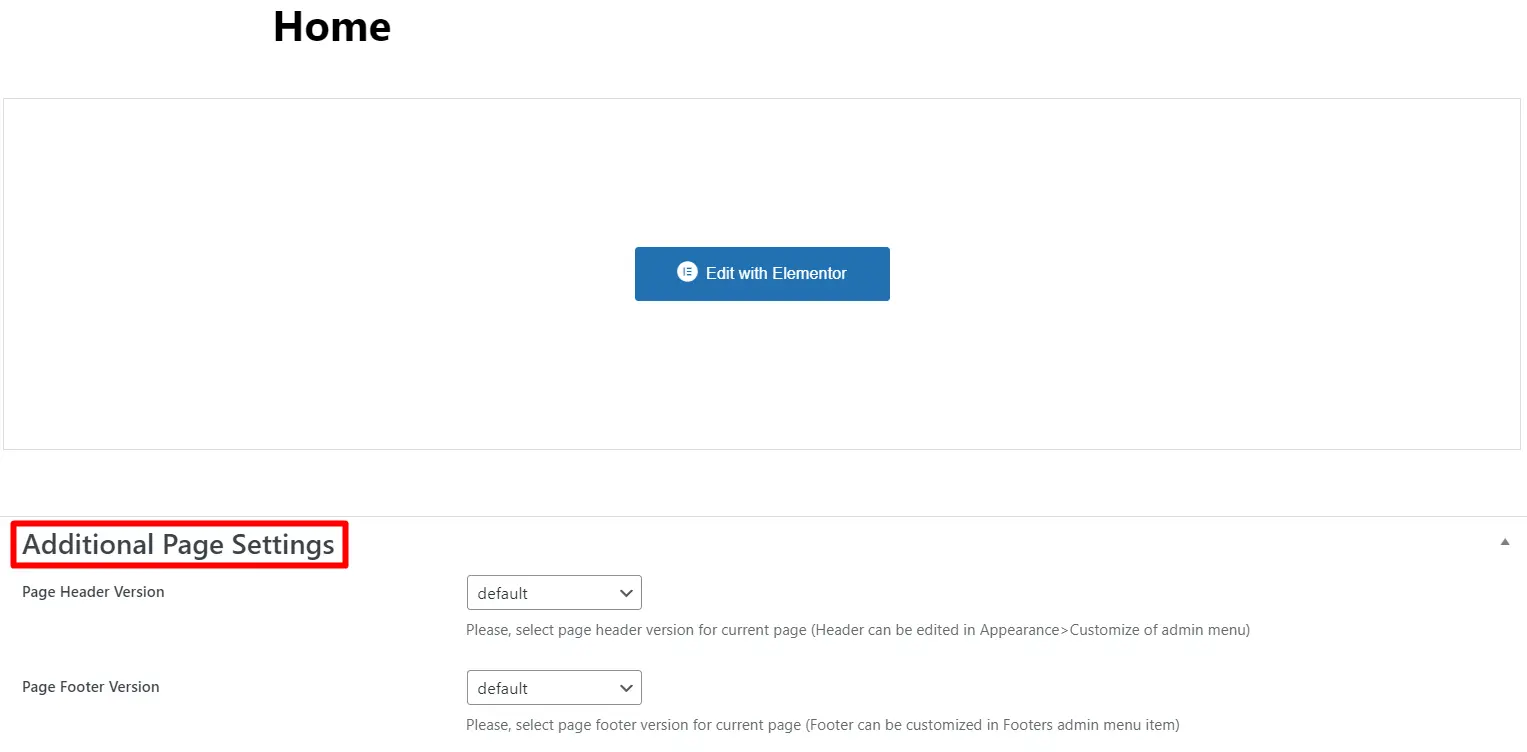
- Then to change page title just click on title and edit it like text.
- You can edit page content by clicking Edit with Elementor.
- If you want to choose a specific version of the header and footer on the page you are editing, you can do it here:
General customization
To customize Forecast theme go to Appearance > Customize. Main settings are:
- Site Identity: Here you can add/change the logo, title and favicon.
- Theme Color Mode: Setting the main five colors of the theme (separately for light and dark modes).
- Header: Here you can choose default header's version that will be displayed on all pages of the website (if a specific version of the header is not specified on a certain page). Also, here you can configure the header (main colors of the header and others) for each of the header versions separately.
-
Footer Version:
Here you can choose default footer's version that will be displayed on all pages of the website (if a specific version of the footer is not specified on a certain page).
Please note that:
The footer is fully customizable with Elementor. To do this, please go from the WordPress admin panel to Footer>All Footers>*select the version of the footer you want to edit*>Edit with Elementor.
- WooCommerce: Woocommerce plugin settings

Menu
In order to edit/add/delete items of the main menu and the footer menu, go to the admin panel of WordPress Appearance>Menus
- First, select the menu you want to edit:
- You can add any of the pages available on the site to the selected menu. To do this, go to Add Menu Items>Pages>View All>*check page[s] you want to add * and click the Add to Menu button:
- After that, the element of the newly added page will appear at the bottom of the menu. Click on it and drag it anywhere in the menu (including the submenu area):
- In a similar way, you can add links to external sites to the menu. To do this, at the stage of adding a menu item, select the Add menu items>Custom Links tab. Enter URL and Link Text. Then click the Add to Menu button.
- You can also remove a menu item by clicking first on the arrow on the item and then on the Remove button.


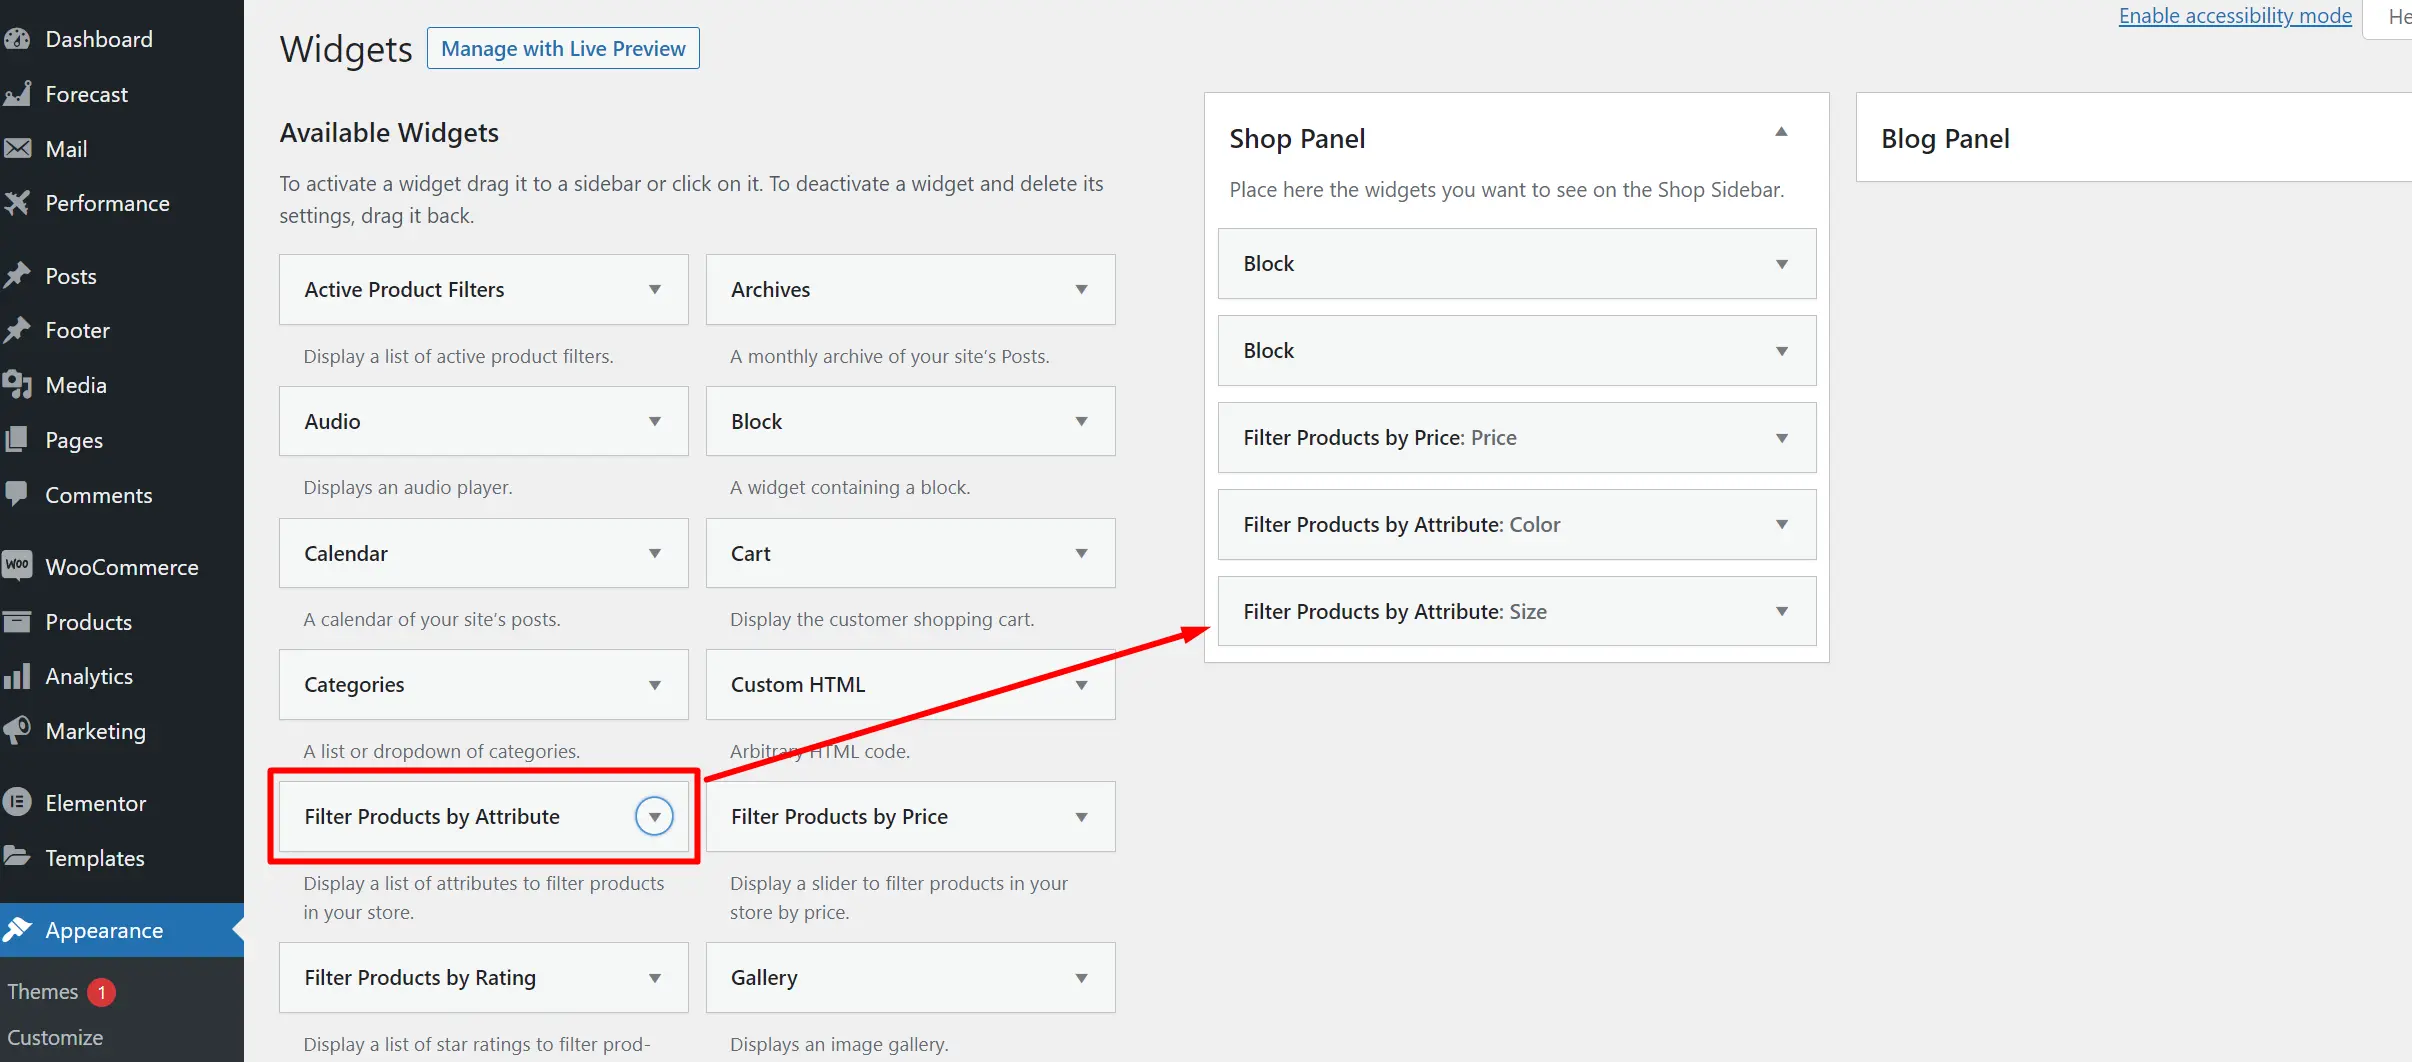
Widgets
With the help of widgets, you can separately customize the vertical sidebars of the Shop and Blog pages.
Widgets can be edited in Wordpress admin panel: Appearance > Widgets.
Shop Panel
To make changes to the sidebar on the Shop page, edit the Shop Panel.

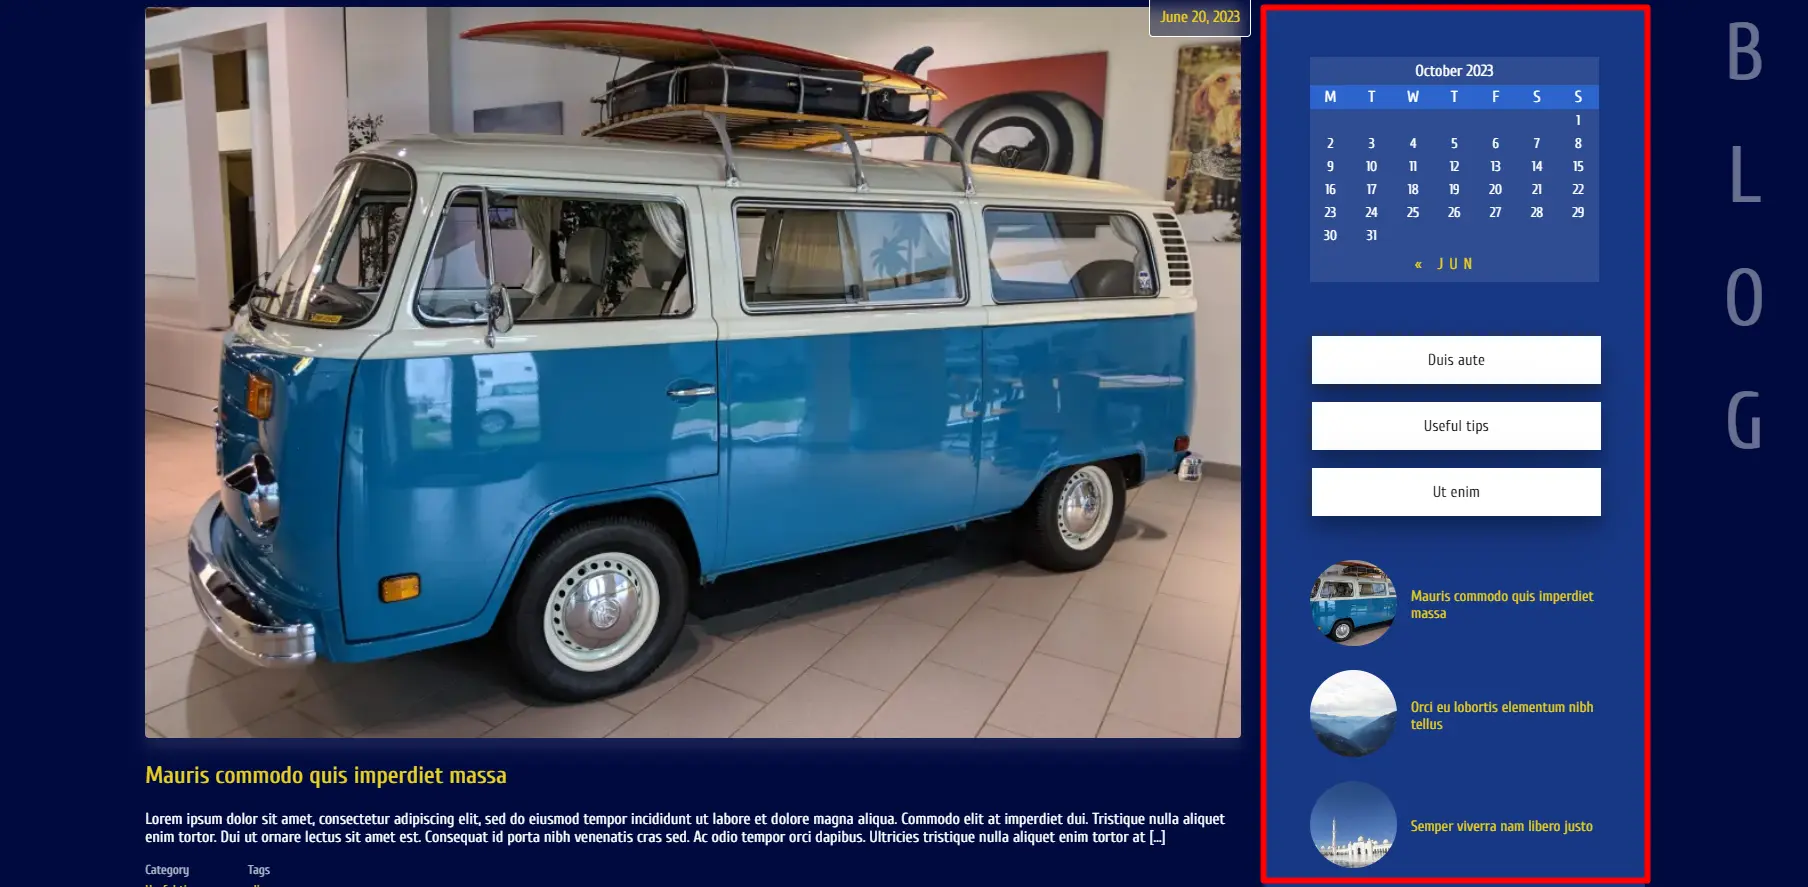
Blog Panel
To make changes to the sidebar on the Blog page, edit the Blog Panel.
Add New Widget on Panel
To add a new widget to the sidebar, drag and drop the desired widget (rectangle) from the Available Widgets section to the Shop Panel section or to the Blog Panel section.
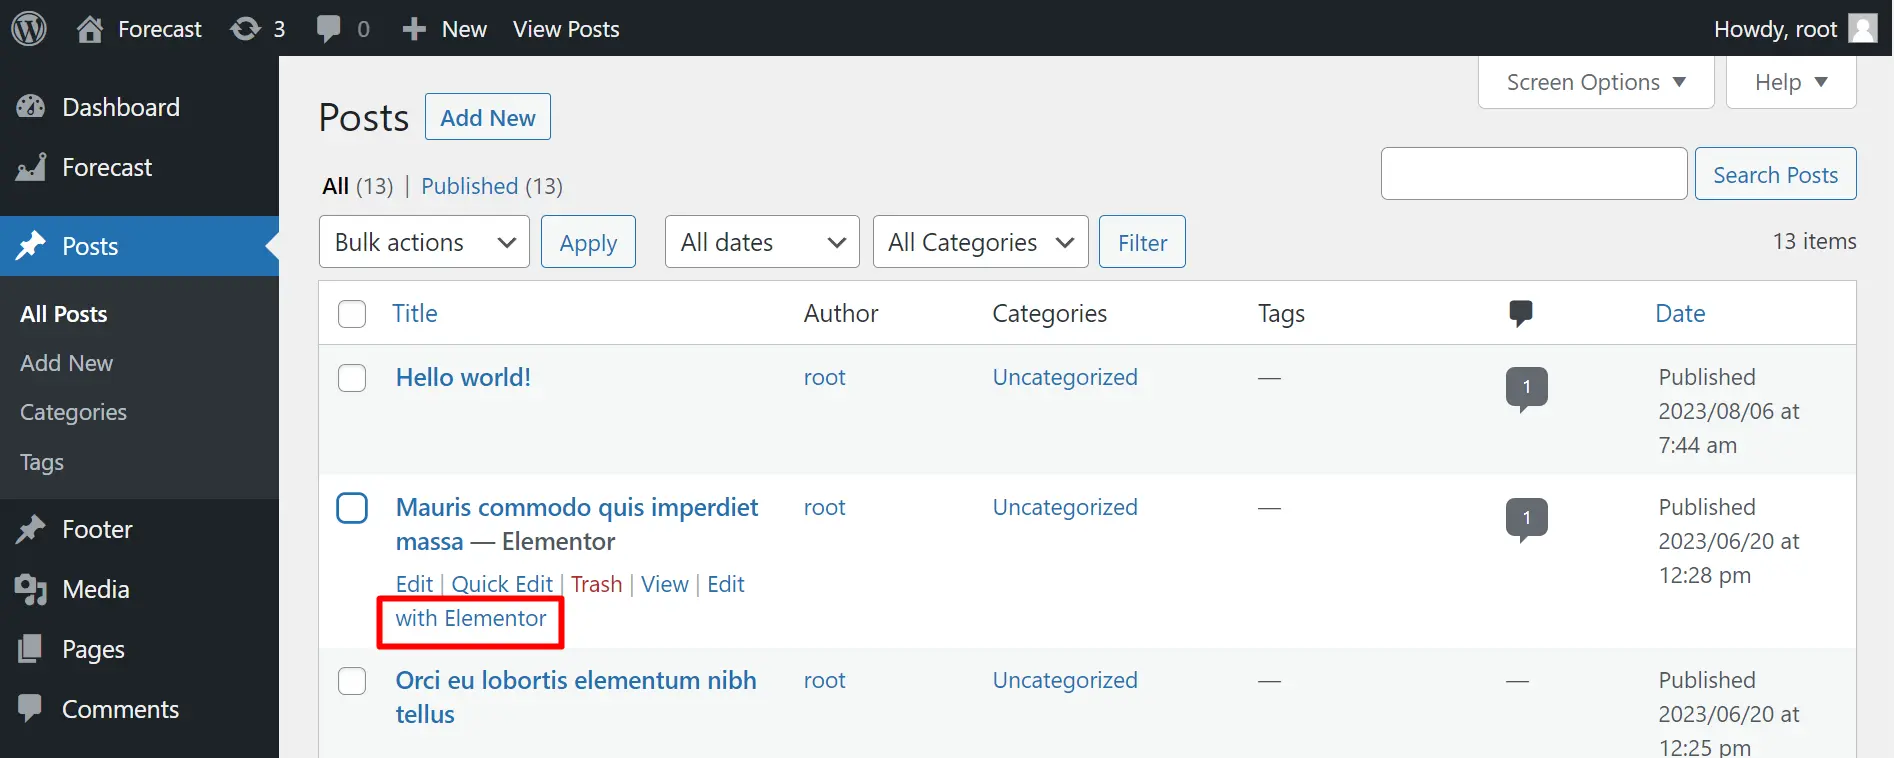
Blog Page
Follow the steps below to create a new post:
- Go to Posts in admin panel.
- Then click on the Add New button.
- Add the post title.
- Finally, configure the post category and tags on the right hand side.
Please note that you can edit a post with Elementor:
Elementor
Our theme uses the popular Elementor plugin, which provides the user with a wide range of customization options. Also, this plugin allows the user to create new page layouts without the need for coding. You can see the features of this plugin here.
Please note that we have developed custom elements specifically for our theme, which are marked with the prefix TP- (Theme Plugin). We recommend that you use them when developing your new page layouts:

WooCommerce
WooCommerce is a popular plugin that turns a WordPress website into eCommerce.
Products
In order to edit/add/delete products of your store, click on Products in the WordPress admin panel:

Orders
Orders placed by your customers can be viewed and managed in the WordPress admin panel by going to WooCommerce>Orders:

More detailed information about using WooCommerce, you can find in the documentation.
Internationalization
Forecast can be translated into any language. To do this, you need to go through several steps described below:
First of all please download and install Poedit on your local computer.
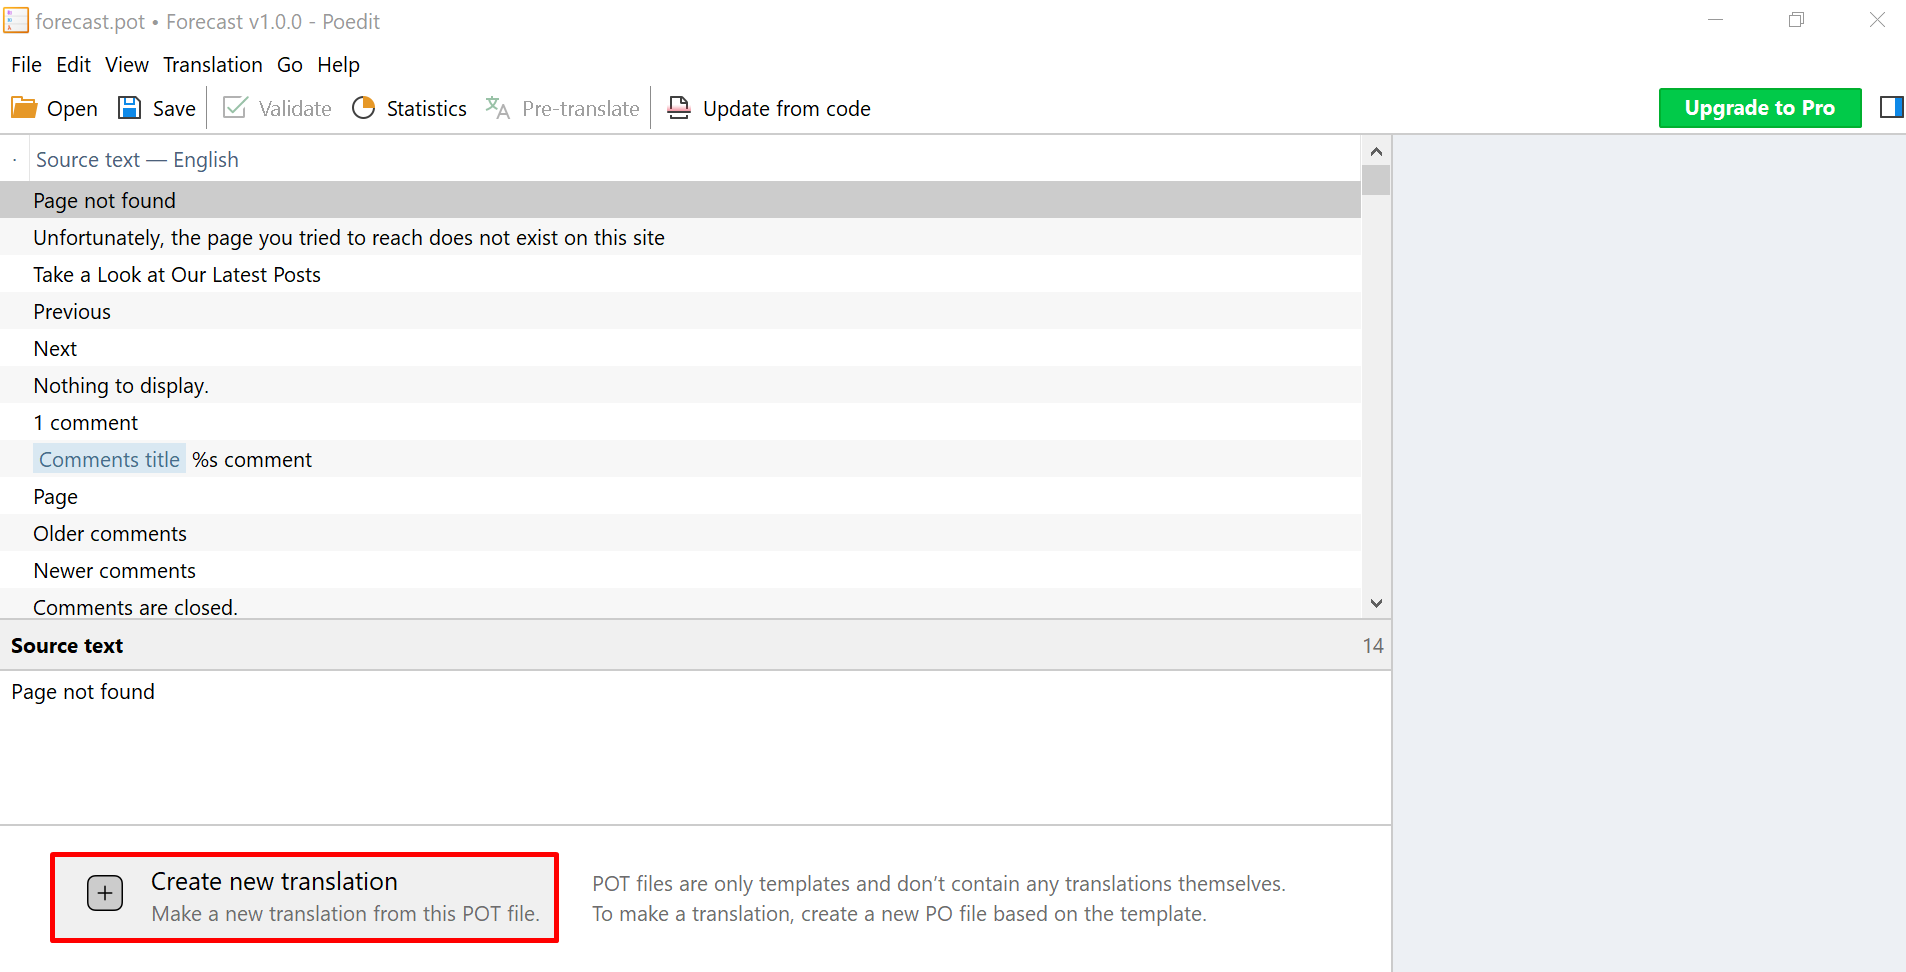
Theme Internationalization
- Open forecast.pot file by Poedit app.
- Click on Create new translation button then choose language you want to make translation.
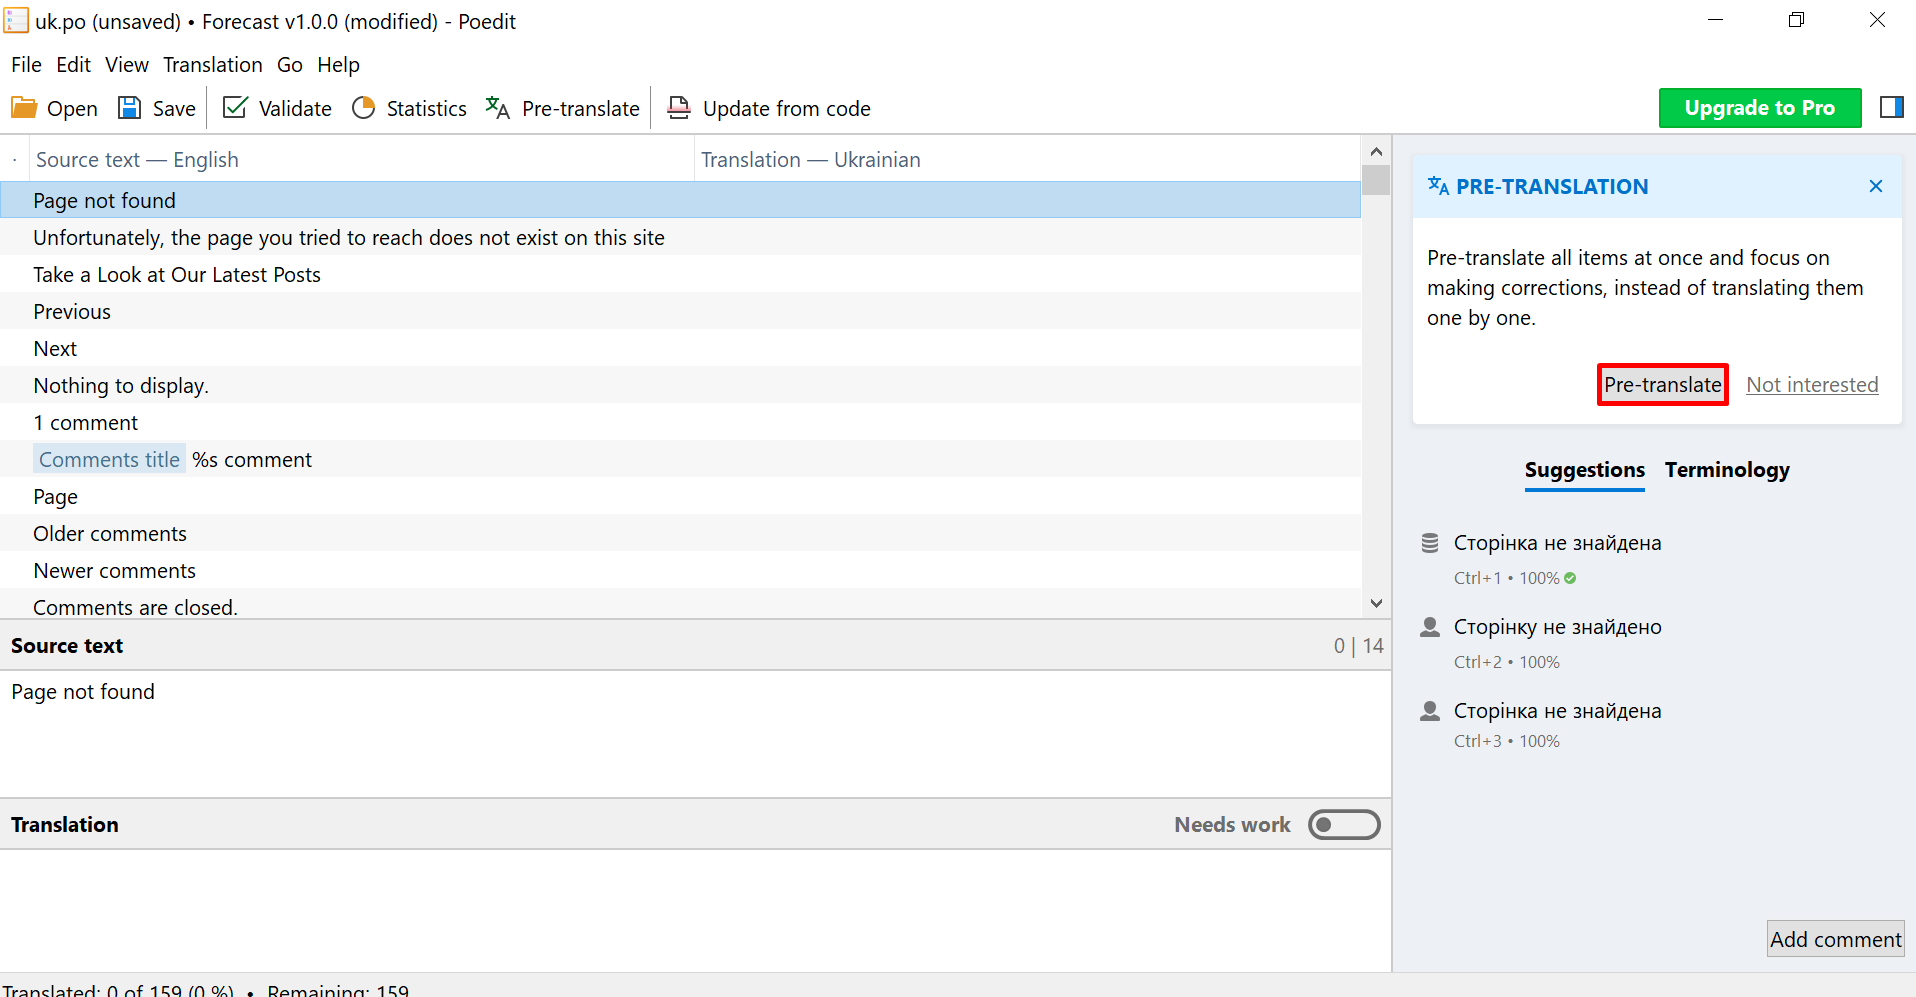
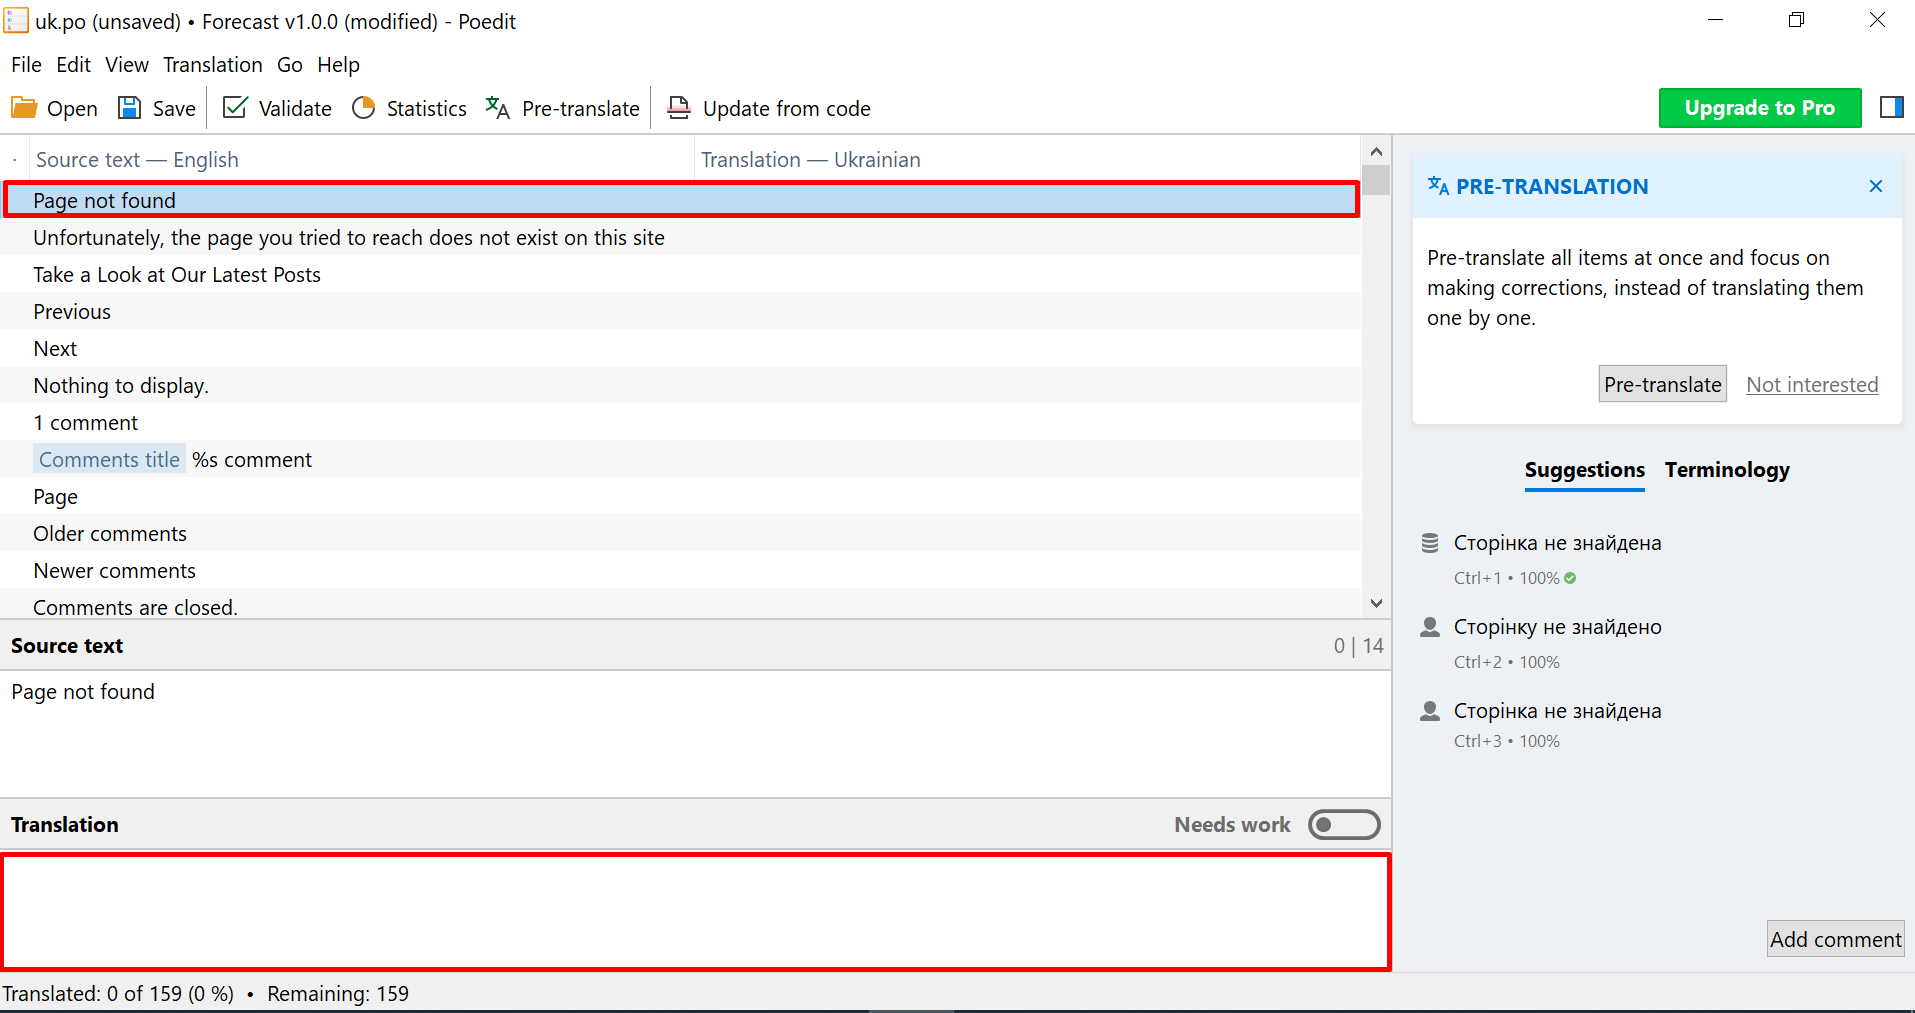
- Click on Pre-translate button to automatically translate all rows:
- Go through all the lines and edit the translation if there are inaccuracies:
- Press Save button
- Put this .mo and .po files to languages folder of forecast theme on the host.
ThemePlugin Internationalization
A big part of the Forecast theme is the ThemePlugin, which needs to be internationalized separately. The procedure for internationalizing a plugin is very similar to internationalizing a theme:
- Open themeplugin.pot file by Poedit app.
- Please repeat points 2,3 and 4 of the Theme Internationalization procedure.
-
Go to File>Save as.. and append themeplugin-
string to proposed by Poedit filename. Like this:

- Then press Save button.
- After that put this .mo and .po files to wp-content/ plugins/ themeplugin/ languages wordpress folder.


In the WordPress admin panel, go to Settings > General and set the same language you used for the translation
This process will only partially translate the website. You will need to additionally translate the content of the website - in such places as Pages (created by Elementor), Posts, Menus, Widgets and WooCommerce products data.
Seo
Seo stands for Search Engine Optimization. That is, the ultimate goal of Seo is that your online store will be found in Google search results.
Google bots scan (index) all websites on the Internet, while assigning each website its own rating. The higher the rating, the higher the website will appear in search results.
Only Google knows exactly what algorithms are used to assign a rating to websites, but it is known for sure that such things as high website Performance and relevant Title and Meta Description greatly increase the rating.
Performance
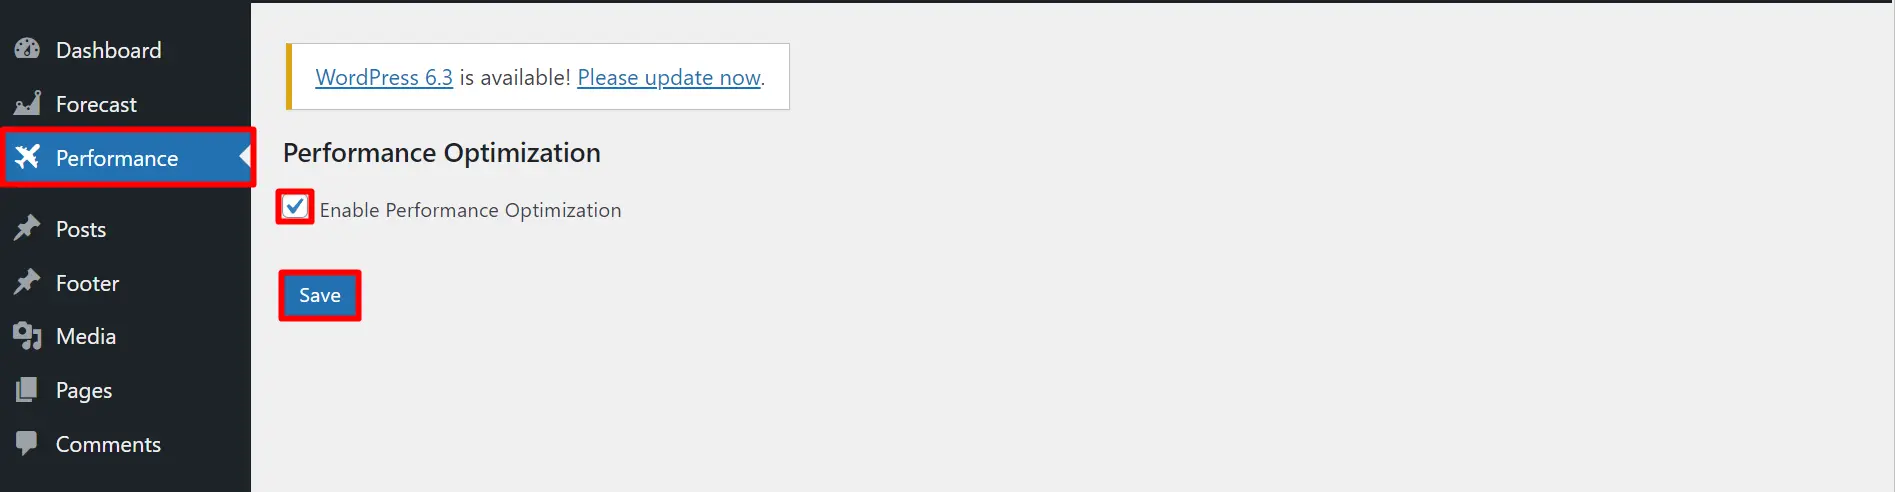
In the Forecast theme, you can increase the website performance just by enabling the Enable Performance Optimization option. (By default, this option is already enabled). To do this, go to the admin panel in the Performance section > check the box > click the Save button.
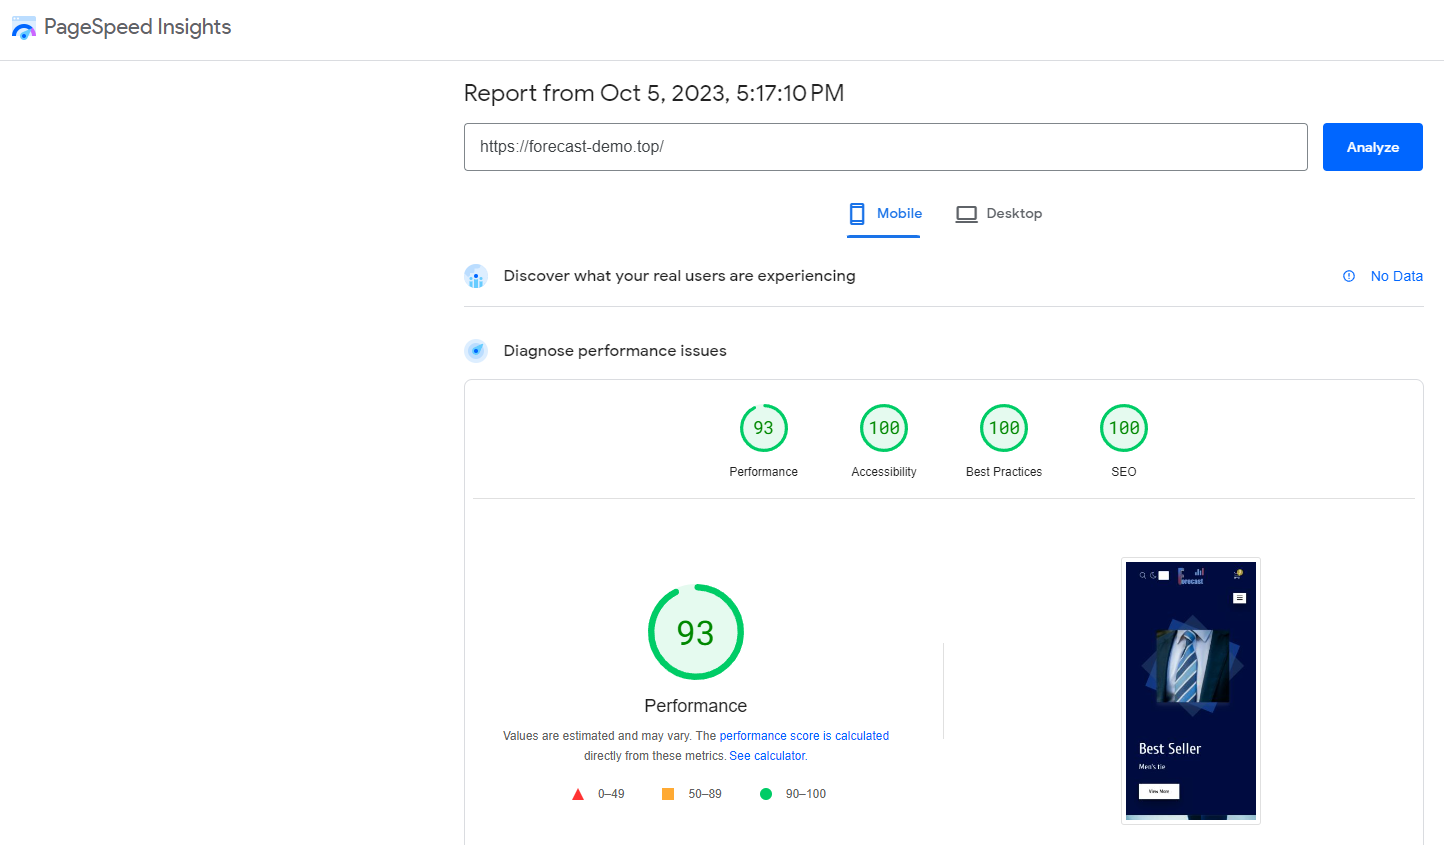
You can check the perfofrmance on the Google service https://pagespeed.web.dev/.
Google service showed that Forecast has 90-98% for Mobile devices:
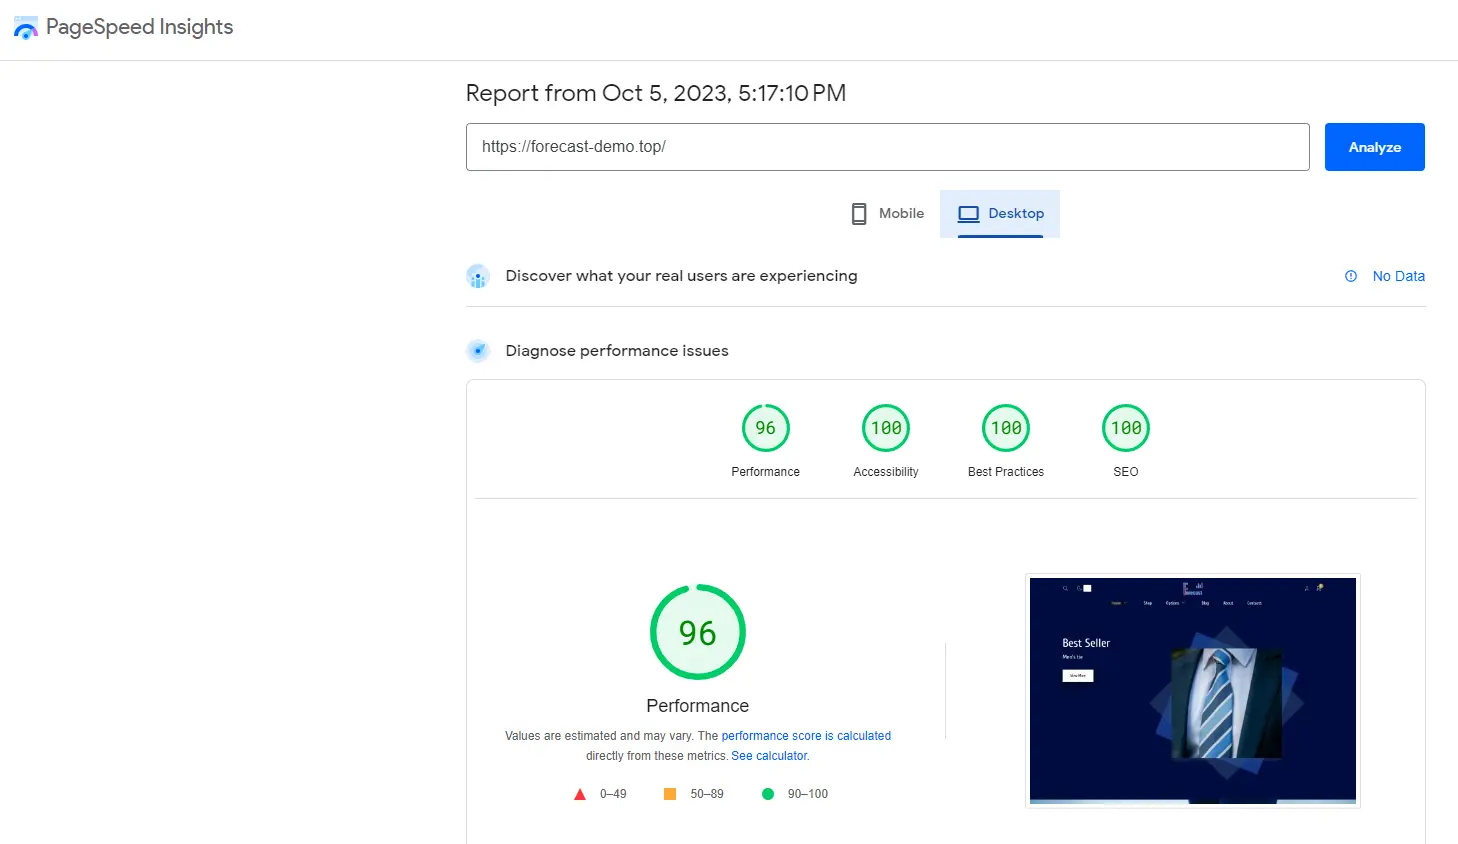
And 90-100% for Desktop devices:
To improve site performance parameter as measured by Google search bots, we strongly recommend hosting the site on a host that supports the HTTP2 network protocol.
In order to check the current and correct metrics on https://pagespeed.web.dev/, we recommend clearing browser cookies.

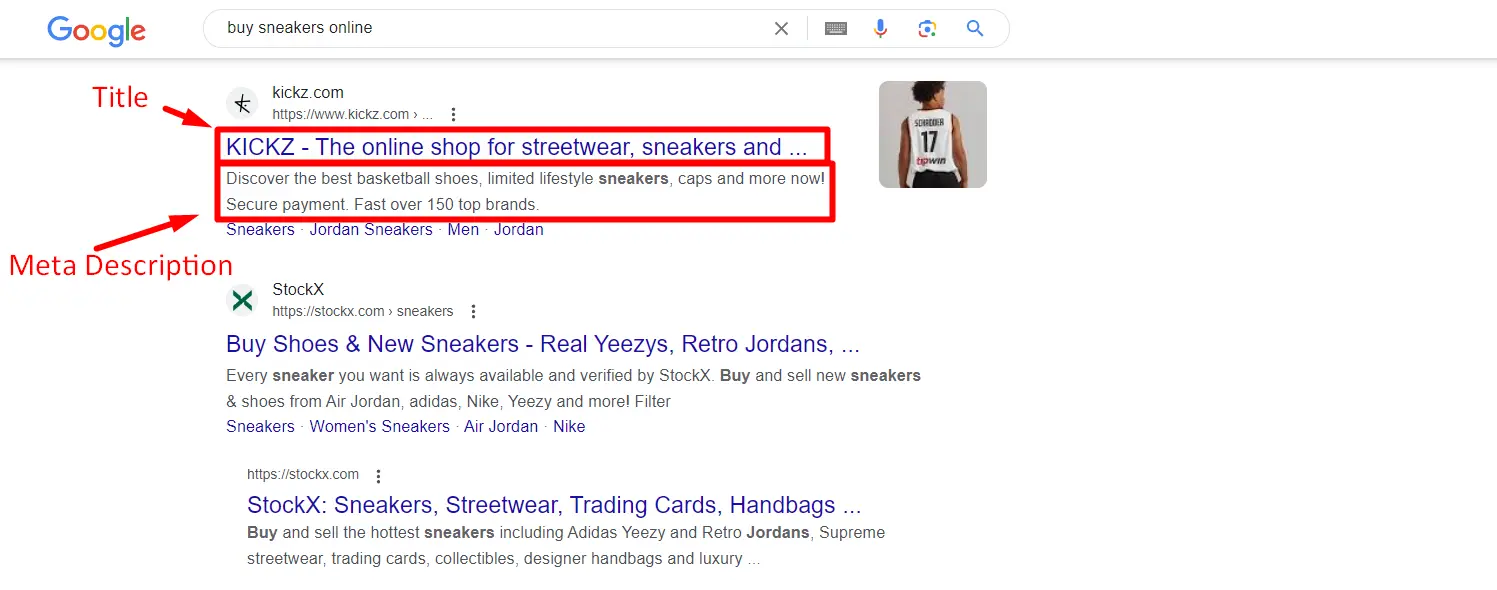
Title and Meta Description
The Title is the main identifier of a certain page of your website, which can be used to find this page on the Internet. The titles of the website pages are displayed in the Google search results.
The Meta Description is an addition to the title and is displayed in the Google search results under it.
You can manually set the Title and Meta Description for almost any page in the Forecast theme. We recommend doing so.
-
To do this for regular pages, please go to the admin panel>Pages>click Edit next to the desired page>edit the title and meta description as shown in the screenshot below:
-
For Product page Meta Description is equal to Product short description wich you can find in admin panel>Products>click Edit next to the desired product>scroll down a bit to find it.
-
For Product Category page Meta Description is equal to Description wich you can find in admin panel>Products>Categories>click Edit next to the desired category>Description.
